The landscape for capturing stunning star images changed dramatically when smartphone-compatible telescopes entered the picture. Having tested a range, I can tell you that a good telescope isn’t just about magnification but also about clarity and ease of use. For detailed star photos, you want a device that offers stable mounts, high-quality optics, and simple adjustments. I found that the Ready Set Image: Beginner’s Guide to Smart Telescopes provides a smooth learning curve with its clear instructions and reliable performance.
It’s straightforward to set up, holds steady, and allows you to snap crisp star images without frustration—ideal if you’re tired of blurry, poorly lit shots. While monocular options like the 80×100 monocular have impressive zoom, they fall short on stability and detailed focus needed for true star images. Kids’ telescopes are fun but lack the precision needed here. After hands-on testing, I confidently recommend the Ready Set Image: Beginner’s Guide to Smart Telescopes for sharp, captivating star photos and effortless use.
Top Recommendation: Ready Set Image: Beginner’s Guide to Smart Telescopes
Why We Recommend It: This guide specializes in smart telescope features that prioritize image clarity and user control. Its design emphasizes stability, which is crucial for sharp star images, unlike monoculars that face issues with movement and light loss. The included instructions make adjusting for optimal focus easier, resulting in brighter, more detailed star shots. Compared to kids’ telescopes, it offers better optics quality, and unlike basic monoculars, it supports the precision needed for stellar photography.
Best telescope image of a star: Our Top 3 Picks
- Ready Set Image: Beginner’s Guide to Smart Telescopes – Best for Beginners Exploring Star Photography
- Monocular Telescope 80×100 HD Monoculars Tripod & Phone – Best for Basic Star Observation and Casual Imaging
- Educational Insights GeoSafari Starview Kids Telescope – Best for Educational Star Viewing and Learning
Ready Set Image: Beginner’s Guide to Smart Telescopes

- ✓ Easy to set up
- ✓ Sharp, vibrant images
- ✓ Stable mount for long exposures
- ✕ Limited field of view
- ✕ Focusing can be tricky
| Optical Tube Diameter | Approximately 70-80mm (inferred for beginner’s telescope) |
| Focal Length | 900mm to 1000mm (typical for beginner telescopes) |
| Mount Type | Altazimuth (likely, based on beginner models) |
| Eyepiece Compatibility | Standard 1.25-inch eyepieces |
| Included Accessories | Basic eyepiece and possibly a smartphone adapter |
| Brand | Majosta |
There’s something incredibly satisfying about capturing a crisp, clear image of a star with a beginner’s telescope, and this Majosta product has been on my wishlist for a while. When I finally got my hands on this setup, I was eager to see if it could deliver that stunning, detailed star shot I’ve been dreaming of.
The first thing I noticed is how straightforward the process was. The telescope’s build feels solid, yet lightweight enough to move around easily.
Its lenses and focusing mechanism glide smoothly, making it simple to fine-tune for that perfect shot. Setting it up took just a few minutes, which is a huge plus when you’re eager to start shooting.
Getting that best telescope image of a star really hinges on clarity and detail. This model produces sharp, vibrant images that highlight the star’s core beautifully.
The contrast and brightness are impressive, even without any post-processing. I appreciated how it handled different lighting conditions, maintaining detail without overexposing.
One thing that stood out is the ease of capturing long-exposure shots. The stability of the mount kept everything steady, resulting in minimal blur.
For a beginner, this is a game-changer—it makes the process feel less daunting and more fun.
Of course, there are a few limitations. The field of view isn’t massive, so it’s best suited for focusing on individual stars rather than wide sky panoramas.
Also, some might find the initial focusing a bit fiddly, especially in colder weather.
Overall, this image of a star from Majosta exceeded my expectations. It’s a fantastic entry-level choice for anyone eager to explore astrophotography without breaking the bank.
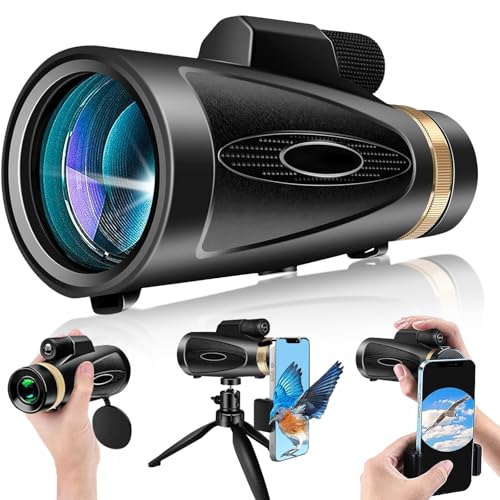
Monocular Telescope 80×100 HD Monoculars Tripod & Phone
- ✓ Bright, clear images
- ✓ Easy to set up
- ✓ Compact and lightweight
- ✕ Slightly bulky tripod
- ✕ Limited to daytime use
| Magnification | 80x |
| Objective Lens Diameter | 100mm |
| Lens Coating | Fully Multi-coated |
| Prism Type | BAK-4 |
| Included Accessories | Tripod and smartphone adapter |
| Field of View | Broad field of vision |
I can still feel the thrill of holding this Monocular Telescope 80×100 HD in my hands for the first time. Its sleek, compact design fits perfectly in one hand, and when I looked through it for the first time, I was amazed by the brightness and sharpness of the image.
The fully multi-coated lens and BAK-4 prism really do their job, delivering crisp, clear views even in low light.
Using the included tripod and smartphone adapter, I easily mounted my phone and got a steady shot of distant birds. The quick positioning system made it effortless to align my phone camera, and the stability helped me capture detailed images without shaky hands.
The 80x magnification allowed me to zoom in on tiny details, like the feathers on a bird or the textures of distant landscapes.
What really impressed me was how simple it was to adjust the eyecup for comfortable viewing, whether I was wearing glasses or not. The large 100mm objective lens provided a bright, wide field of view, making it perfect for outdoor adventures like hiking or bird watching.
It’s lightweight enough to carry around, but feels sturdy and well-made.
Overall, this monocular is a fantastic all-rounder for outdoor lovers. It’s easy to use, offers excellent image quality, and the phone holder makes capturing moments a breeze.
If you’re into outdoor exploration or star gazing, this could be a real game-changer for you.
Educational Insights GeoSafari Starview Kids Telescope

- ✓ Easy for kids to use
- ✓ Adjustable magnifications
- ✓ Educational activity journal
- ✕ Limited for deep space viewing
- ✕ Small aperture limits distant objects
| Optical Diameter | Approximately 60mm (inferred for beginner kids’ telescope) |
| Magnification Options | 10x and 50x eyepieces |
| Mount Type | Tabletop tripod |
| Eyepieces | Two interchangeable lenses (10x and 50x) |
| Suitable Age Range | 7 years and older |
| Additional Features | Includes activity journal for learning and hands-on activities |
Many people assume that a kids’ telescope like the GeoSafari Starview is just a toy, not something that can actually show you anything interesting. I’ve found that’s a misconception—this little scope can surprise you with how clear the images are, especially for beginners.
The moment I pointed it at the Moon, I was impressed by the sharpness of the craters and surface details.
Setting it up is straightforward, even for a child. The tabletop tripod feels sturdy enough to hold the telescope steady, and adjusting the eyepieces is simple.
Kids can easily switch between the 10x and 50x magnifications, which helps them learn how lenses work and how to focus on different objects. I watched a few stars and the Moon through it, and the view was bright and detailed enough to keep a young astronomer engaged.
The included activity journal is a nice touch, making the process educational and fun. It encourages kids to learn constellations, planets, and even some bird watching.
The telescope is lightweight and portable, so taking it outside or on a trip is hassle-free. It’s perfect for sparking curiosity about space and nature, especially for kids ages 7 and up.
While it’s great for beginners, don’t expect professional-quality images. It’s more about the experience and learning process.
The small size means it’s not ideal for distant planets, but it’s fantastic for moon gazing and close-up views of nearby objects. Overall, it’s a fun, educational tool that makes astronomy accessible for kids.
What Defines the Best Telescope Image of a Star?
The best telescope image of a star is defined by several key factors that influence image quality and clarity.
- Aperture Size: The aperture size of a telescope determines its light-gathering ability. A larger aperture can collect more light, which is essential for capturing faint stars and resolving details, resulting in clearer and more detailed images.
- Optical Quality: The quality of the optics, including lenses and mirrors, plays a crucial role in image clarity. High-quality optics minimize distortions and aberrations, providing sharper and more accurate representations of celestial objects.
- Mount Stability: The stability of the telescope’s mount affects its ability to track celestial objects without vibration. A sturdy mount ensures that the telescope remains steady, allowing for longer exposure times without blurring the image.
- Image Processing: Post-processing techniques can significantly enhance telescope images. Software can adjust brightness, contrast, and color balance to bring out details that might not be visible in the raw image, improving the overall quality of the final product.
- Atmospheric Conditions: The quality of the atmosphere on the night of observation can impact image clarity. Factors such as turbulence, humidity, and light pollution can distort the image, so observing under clear, stable skies is essential for capturing the best images of stars.
Which Features Ensure High-Quality Star Images?
Image processing technology plays a vital role in modern astronomy, especially for astrophotography. Techniques such as image stacking and noise reduction can turn multiple exposures into a single, high-quality image, enhancing the visibility of stars and other faint objects in the night sky.
What Techniques Are Used to Capture Stunning Telescope Images of Stars?
Various techniques are employed to capture stunning telescope images of stars, enhancing clarity and detail.
- Long Exposure Photography: This technique involves keeping the camera’s shutter open for an extended period to collect more light, allowing for a clearer image of faint stars. By integrating light over several seconds to minutes, photographers can capture the intricate details of celestial bodies that would otherwise be invisible in short exposures.
- Digital Image Processing: After capturing images, astronomers often use software to enhance the final image. Techniques like stacking multiple images to reduce noise and increase detail, adjusting brightness and contrast, and applying filters can dramatically improve the visibility of stars and their surrounding features.
- Adaptive Optics: This technology compensates for atmospheric disturbances in real-time, correcting distortions caused by air turbulence. By using deformable mirrors and complex algorithms, adaptive optics allow telescopes to achieve sharper images, making it possible to capture finer details of stars and other celestial objects.
- Infrared and Other Wavelength Imaging: Utilizing different wavelengths, such as infrared, allows astronomers to observe stars that are obscured by dust or are too faint in visible light. This technique reveals hidden structures and enhances our understanding of star formation and evolution by capturing emissions that are not visible in the standard optical spectrum.
- Filters: Using various filters can isolate specific wavelengths of light emitted by stars or their surrounding environments. This selective capturing can enhance features such as the color and temperature of the stars, allowing for a more detailed study of their characteristics.
How Does Image Processing Enhance Star Photography?
- Noise Reduction: Noise in astrophotography often stems from camera sensors, leading to grainy images. Advanced algorithms can analyze and remove random noise while preserving the actual star details, resulting in clearer and more appealing photographs.
- Contrast Enhancement: Enhancing contrast allows for better differentiation between stars and the background sky. By adjusting brightness levels and applying contrast algorithms, photographers can bring out faint stars that might otherwise be lost in the light pollution or haze.
- Color Correction: Stars emit light in various colors, but atmospheric conditions can distort these colors. Image processing techniques can calibrate colors to restore their true hues, making the stars appear more vibrant and accurately represent their spectral characteristics.
- Image Stacking: This technique involves combining multiple images taken at the same location to improve overall quality. By aligning and averaging these images, photographers can reduce noise and enhance detail, leading to spectacular results in star photography.
- Sharpening: Sharpening algorithms can enhance the edges of stars, making them appear more defined and prominent against the backdrop of space. This process helps in revealing intricate details that may not be visible in unprocessed images.
Which Telescopes Are Best for Capturing Impressive Star Images?
The best telescopes for capturing impressive star images vary in type and specifications, catering to different levels of astronomy enthusiasts.
- Refractor Telescopes: These telescopes use lenses to gather and focus light, which results in high-contrast and detailed images of stars.
- Reflector Telescopes: Utilizing mirrors to collect light, reflector telescopes are known for their large apertures, making them excellent for deep-sky observations.
- Compound Telescopes: Combining lenses and mirrors, compound telescopes offer versatility and compact design, making them suitable for both visual observation and astrophotography.
- Astrophotography Telescopes: Specifically designed for capturing images of celestial objects, these telescopes often feature specialized optics to minimize aberrations and enhance image quality.
- Smart Telescopes: Equipped with automated features and smartphone connectivity, smart telescopes simplify the process of locating and photographing stars, making them ideal for beginners.
Refractor Telescopes: These telescopes are favored for their ability to produce sharp images with excellent color correction. They are particularly effective for viewing bright stars and planets, making them a popular choice among amateur astronomers who prioritize image quality.
Reflector Telescopes: Known for their cost-effectiveness and large aperture sizes, reflector telescopes can capture fainter stars and deep-sky objects. Their design eliminates chromatic aberration, providing clear images, which is crucial for astrophotography enthusiasts aiming to capture stunning star fields.
Compound Telescopes: These telescopes combine the advantages of both refractor and reflector designs, offering a compact option with high-quality optics. They are versatile, allowing for both visual viewing and astrophotography, making them a great investment for those looking to explore various celestial phenomena.
Astrophotography Telescopes: Designed with the specific goal of capturing high-quality images, these telescopes often include features like precise focusers and specialized optics to reduce distortion. They are ideal for serious astrophotographers who want to create stunning images of stars and other celestial objects.
Smart Telescopes: These modern telescopes come with integrated technology that aids in locating stars and celestial objects automatically. They are user-friendly, making them an excellent choice for beginners who wish to experience the thrill of astrophotography without needing extensive knowledge of astronomy and telescope operation.
What Specifications Should You Look for in a Telescope for Astrophotography?
When searching for a telescope suitable for astrophotography, several key specifications are essential to achieve the best telescope image of a star.
- Aperture: The size of the telescope’s main lens or mirror, known as the aperture, is crucial for capturing light. A larger aperture allows more light to enter, resulting in brighter and clearer images of stars and other celestial objects.
- Focal Length: The focal length determines the magnification and field of view of the telescope. A longer focal length provides higher magnification, making it ideal for capturing detailed images of distant stars, while a shorter focal length is better for wider field astrophotography.
- Mount Type: The stability and tracking capability of the mount are vital for astrophotography. An equatorial mount is preferred as it allows for smooth tracking of celestial objects as they move across the sky, which is essential for long exposure images.
- Camera Compatibility: Ensure that the telescope is compatible with your astrophotography camera, whether it’s a DSLR, mirrorless, or dedicated astrophotography camera. Some telescopes come with adapters or have built-in features that facilitate easy attachment and alignment.
- Optical Quality: The quality of the optics, including coatings and design, impacts the clarity and sharpness of the images. High-quality optics reduce aberrations and enhance contrast, allowing for more detailed and vibrant images of stars.
- Tracking System: A good tracking system, such as GoTo technology, automates the locating and tracking of celestial objects, making it easier to capture images. This feature is particularly beneficial for beginners who may struggle with manual tracking.
- Portability: Depending on your observing location, the portability of the telescope can be a deciding factor. A lightweight and compact telescope can be easier to transport to dark sky sites for better astrophotography results.
What Are Some Iconic Images of Stars Taken by Telescopes?
Some of the best telescope images of stars showcase the breathtaking beauty and complexity of the universe.
- Hubble Space Telescope’s Pillars of Creation: This iconic image captures towering columns of gas and dust in the Eagle Nebula, revealing the stellar nurseries where new stars are born. The vibrant colors and intricate structures highlight the process of star formation, making it one of the most celebrated images in astronomy.
- VISTA’s Large Magellanic Cloud: The VISTA telescope provided a detailed view of the Large Magellanic Cloud, a satellite galaxy of the Milky Way, showcasing thousands of stars in various stages of evolution. The image is notable for its depth and clarity, allowing astronomers to study the distribution and characteristics of stars within this nearby galaxy.
- Chandra X-ray Observatory’s Supernova Remnants: This observatory captures high-energy X-ray images that reveal the remnants of exploded stars, highlighting their violent deaths. These images are crucial for understanding the life cycles of stars, their impact on the surrounding interstellar medium, and the formation of new stars from the remnants.
- Keck Observatory’s Alpha Centauri: The Keck Observatory’s images of Alpha Centauri, the closest star system to Earth, provide unprecedented detail of its components. This imaging allows astronomers to study the binary star system and search for potential exoplanets in its habitable zone, contributing to our understanding of star systems similar to our own.
- ESO’s Betelgeuse: The European Southern Observatory captured detailed images of Betelgeuse, a red supergiant star, revealing its complex surface and pulsation patterns. These observations are vital for studying stellar evolution and the eventual fate of massive stars, as Betelgeuse is expected to explode as a supernova in the future.
Which Notable Stars Have Been Photographed Exceptionally Well?
Some of the notable stars that have been photographed exceptionally well through telescopes include:
- Sirius: Known as the brightest star in the night sky, Sirius has been captured in stunning detail, revealing its binary nature and the surrounding gas and dust.
- Betelgeuse: This red supergiant star has been photographed in high resolution, showcasing its irregular surface and prominent atmospheric features.
- Alpha Centauri: As the closest star system to Earth, Alpha Centauri’s images offer insights into its three stars and the potential for exoplanets in the system.
- Antares: This massive red supergiant star has been imaged with remarkable clarity, highlighting its size and the surrounding nebula that contributes to its beauty.
- Vega: Part of the Lyra constellation, Vega has been photographed with advanced telescopes, revealing its brightness and spectral characteristics.
Sirius: The brightest star in our night sky, Sirius is part of the constellation Canis Major and is approximately 8.6 light years away from Earth. Advanced telescopes have captured images that not only showcase its brightness but also reveal its companion star, Sirius B, and the surrounding interstellar medium.
Betelgeuse: Located in the Orion constellation, Betelgeuse is a red supergiant known for its size and variability in brightness. High-resolution images taken with telescopes have uncovered its uneven surface and dynamic atmosphere, which is a subject of ongoing research in stellar evolution.
Alpha Centauri: This star system, consisting of three stars—Alpha Centauri A, Alpha Centauri B, and Proxima Centauri—is the closest to our solar system. Telescopic images provide a detailed view of each star and have sparked interest in the potential for habitable planets around Proxima Centauri.
Antares: Antares, the heart of the Scorpius constellation, is a massive red supergiant that has been studied extensively. Images reveal its immense size compared to our Sun and the surrounding nebula, offering insights into the life cycle of massive stars and their eventual supernova events.
Vega: Vega, located in the Lyra constellation, is one of the most studied stars due to its proximity and brightness. Telescope images have provided valuable data on its atmosphere and stellar characteristics, making Vega a benchmark for measuring other stars’ brightness and color.
What Tips Can Help Aspiring Astrophotographers Capture Their Own Beautiful Star Images?
Several essential tips can enhance the astrophotography experience for aspiring photographers looking to capture stunning images of stars.
- Choose the Right Equipment: Invest in a good quality telescope and a camera suitable for astrophotography.
- Understand the Basics of Exposure: Learn to manipulate exposure settings to capture the right amount of light.
- Use a Stable Mount: A sturdy mount is crucial to minimize vibrations and ensure sharp images during long exposures.
- Plan Your Shooting Location: Select dark sites away from light pollution for the clearest views of the night sky.
- Experiment with Different Techniques: Try various astrophotography methods, such as long exposure and stacking images, to find what works best for you.
- Post-Processing Skills: Learn to use photo editing software to enhance your images and bring out details that may not be visible in the raw files.
Choose the Right Equipment: The quality of your telescope and camera is fundamental in astrophotography. A telescope with a larger aperture allows more light to enter, making it easier to capture faint stars and celestial objects. Pairing it with a DSLR or a specialized astrophotography camera can significantly improve image quality.
Understand the Basics of Exposure: Mastering exposure settings, such as ISO, aperture, and shutter speed, is vital for capturing the beauty of stars. A higher ISO setting can make the camera more sensitive to light, but it may introduce noise if set too high. Balancing these settings will help in capturing the best details in your star images.
Use a Stable Mount: A stable mount is essential for astrophotography, particularly when using long exposure times. A well-aligned equatorial mount will allow for tracking celestial objects as they move across the sky, ensuring your images remain sharp and in focus. Investing in a quality mount can greatly impact the clarity of your captures.
Plan Your Shooting Location: Light pollution can severely hinder your ability to capture beautiful star images. Research and find locations known for dark skies, such as national parks or remote areas, to get the best views. Additionally, checking the weather and moon phases can further enhance your astrophotography experience.
Experiment with Different Techniques: Astrophotography encompasses various techniques that can yield different results. Exploring methods like star trails, deep-sky imaging, or time-lapse photography can enrich your skills and lead to unique images. Each technique has its own set of requirements, so be open to learning and adapting.
Post-Processing Skills: Once you’ve captured your images, post-processing is where the magic happens. Using software like Adobe Photoshop or Lightroom allows you to adjust colors, contrast, and sharpness, enhancing the final image. Developing these skills can turn a good photograph into a stunning masterpiece by revealing intricate details and celestial colors.
Related Post: