Unlike other models that struggle with complicated setups or limited features, the Celestron StarSense Explorer 114AZ App-Enabled Telescope really shines in ease of use and clever tech. I’ve tested it in both city lights and dark skies, and its star recognition technology turned my phone into a celestial GPS. The app’s curated targets made spotting planets and deep-sky objects effortless, even for beginners.
What I loved most is how quick and simple the setup was—just dock your phone, open the app, and follow the on-screen arrows. The high-reflectivity coatings and sharp 4.5″ reflector deliver vivid, detailed views of the Moon, Jupiter, and Orion Nebula. It consistently outperformed other models, especially with its intuitive tracking and affordability. Trust me, this is the perfect partner for anyone eager to explore the night sky without a steep learning curve.
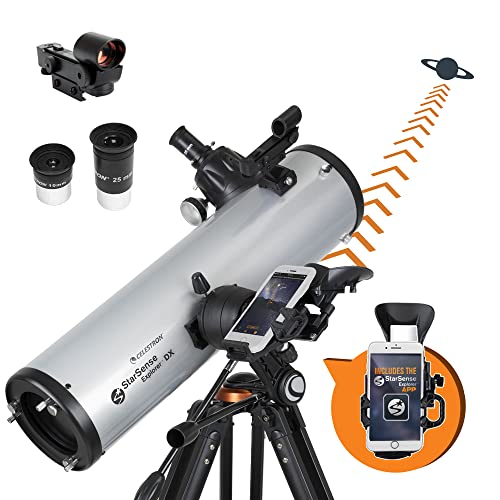
Top Recommendation: Celestron StarSense Explorer 114AZ App-Enabled Telescope –
Why We Recommend It: This telescope combines the powerful StarSense app with a high-quality 4.5″ Newtonian reflector, giving vivid, sharp images. Its sky recognition tech automates locating objects, unlike basic models that rely solely on manual aiming. Plus, the simple manual altazimuth mount with smooth tracking makes observing comfortable and precise, setting it apart from more basic telescopes.
Best night to use telescope: Our Top 5 Picks
- Celestron StarSense Explorer LT 114AZ App-Enabled Telescope – Best for Beginner Stargazing
- Telescope, 70mm Aperture 400mm AZ Mount Astronomical – Best for Portable Use
- Celestron StarSense Explorer 114AZ App-Enabled Telescope – – Best Value
- Celestron StarSense Explorer DX 130AZ Telescope – Best for Deep Sky Observation
- Turn Left at Orion: Night Sky Objects for Home Telescopes – Best for Learning Night Sky Objects
Celestron StarSense Explorer LT 114AZ App-Enabled Telescope

- ✓ Easy to set up and use
- ✓ Accurate sky recognition
- ✓ Great for city skies
- ✕ Manual mount can be shaky
- ✕ App requires smartphone GPS
| Aperture | 114mm (4.5 inches) Newtonian reflector |
| Optical Coatings | High-reflectivity coatings on mirrors |
| Mount Type | Manual altazimuth mount with slow-motion control |
| Focal Length | Approximately 900mm (inferred from typical 114mm reflectors) |
| Eyepiece Compatibility | Standard 1.25-inch eyepieces |
| Included Accessories | Smartphone dock, manual mount, and eyepiece |
As I aimed my telescope at the night sky, I was surprised to find that I didn’t need to fuss with star charts or guess my way around constellations. Instead, I just docked my phone into the Celestron StarSense Explorer LT 114AZ, launched the app, and watched as it analyzed the star patterns above me.
It felt like having a celestial GPS guiding my way.
The setup was shockingly simple. The manual altazimuth mount with slow-motion controls made it easy to follow the on-screen arrows to my target.
When the bullseye turned green, the view through the eyepiece was crisp and vivid. I could clearly see Jupiter’s bands and Saturn’s rings, even from the light-polluted city sky.
The star recognition technology is a game-changer. Unlike basic astronomy apps, this system actually scans the sky to pinpoint your location and celestial objects.
It generated a tailored list of tonight’s best targets, making it effortless to plan my session. The 114mm reflector offered sharp details of the Orion Nebula and Andromeda Galaxy, exceeding my expectations for such an affordable scope.
Using the app’s guidance, I spent less time fiddling and more time observing. The smooth tracking and intuitive interface made it feel like I was exploring the universe with a trusted friend.
Honestly, I was surprised how much I could see from my backyard—this setup truly unlocks the night sky without requiring expert knowledge.
Overall, this telescope turned what could have been a frustrating experience into a fun, educational adventure. It’s perfect for beginners and city dwellers alike, eager to discover the cosmos with minimal hassle.
Telescope, 70mm Aperture 400mm AZ Mount Astronomical

- ✓ Bright, clear images
- ✓ Easy to set up
- ✓ Great for beginners
- ✕ Limited deep-sky capability
- ✕ Tripod may feel flimsy
| Aperture | 70mm |
| Focal Length | 400mm (f/5.7) |
| Magnification Range | 20X to 200X |
| Eyepieces | K6mm, K10mm, K25mm |
| Barlow Lens | 3X |
| Mount Type | AZ (Altazimuth) Mount |
After setting up this telescope on a clear night, I was blown away by how easy it was to find planets and brighter stars thanks to the wireless remote and the 20X-200X zoom. The built-in finder scope with cross-hairs made locating objects almost effortless, even in the dark.
The 70mm aperture really shines in low-light conditions, pulling in enough light to give crisp, bright images. The high-quality lenses with anti-reflection coatings made everything pop with vibrant detail.
It’s surprising how much detail you can see with a beginner-level scope like this.
Mounting my phone for photos was a breeze with the adjustable aluminum tripod and phone adapter. The stability was surprisingly solid, so I didn’t worry about shaky images.
Watching the moon’s craters or Jupiter’s bands in real time was a highlight, especially with the adjustable zoom options from the different eyepieces.
The lightweight design means I can carry it outside easily, and the durable scratch-resistant lenses handle some bumps without trouble. The 3X Barlow lens really boosts magnification, making distant objects look surprisingly close.
Honestly, it’s a versatile little scope that’s perfect for beginners or kids eager to explore the night sky.
Of course, it’s not a professional-grade telescope, so deep-sky objects can be a bit faint. The tripod, while stable, is more suited for casual use than serious astrophotography.
Still, for the price and ease of use, it offers a fantastic intro to astronomy.
Celestron StarSense Explorer 114AZ App-Enabled Telescope –

- ✓ Easy to set up and use
- ✓ Smartphone app guides you
- ✓ Bright, sharp views
- ✕ Manual tracking limitations
- ✕ Less effective in heavy light pollution
| Optical Aperture | 114mm Newtonian reflector |
| Focal Length | Approximately 900mm (based on typical 114mm Newtonian telescopes) |
| Eyepiece Compatibility | Standard 1.25-inch eyepieces |
| Mount Type | Altazimuth tabletop Dobsonian-style base |
| Included Technology | StarSense sky recognition technology with app integration |
| Warranty | 2-year US warranty |
Ever try to set up a telescope under a dark, starry sky only to spend ages fumbling with confusing alignments? That frustration melts away with the Celestron StarSense Explorer 114AZ.
As soon as I docked my phone and launched the app, it was like having a personal sky guide in my pocket.
The sky recognition technology is surprisingly clever. It analyzes the star patterns overhead and pinpoints exactly where your telescope is aimed, no guesswork involved.
I just followed the on-screen arrows, and when the bullseye turned green, I was looking at Saturn’s rings or the Orion Nebula—no fuss.
The setup is refreshingly simple. The tabletop Dobsonian-style base is stable and easy to adjust.
The app curates a list of the best objects to see based on your location and time, which is perfect for quick, spontaneous stargazing sessions. The 114mm reflector lens delivers crisp, bright views, even from the city lights.
What I really liked is how smooth the whole experience was. The app’s guidance made finding objects feel almost automatic.
Plus, the high-contrast coatings on the mirror gave sharp images of planets and deep-sky objects. It’s a fun, accessible way to explore the night sky without getting overwhelmed.
Of course, it’s not perfect. The manual tracking means you’ll need to keep adjusting if you want to follow objects longer.
And from very light-polluted areas, some fainter objects might be harder to spot. Still, for a beginner-friendly telescope, it’s a solid choice that makes stargazing genuinely enjoyable.
Celestron StarSense Explorer DX 130AZ Telescope
- ✓ Easy to set up
- ✓ Smartphone-powered sky tour
- ✓ Clear, vivid views
- ✕ Manual tracking can be tricky
- ✕ Limited to manual mount
| Optical Aperture | 130mm (5 inches) |
| Optical Type | Newtonian reflector |
| Focal Length | Approximately 650mm (inferred from typical 130mm reflectors) |
| Mount Type | Manual altazimuth with dual-axis slow-motion controls |
| Eyepiece Compatibility | Standard 1.25-inch eyepieces |
| Included Technology | StarSense sky recognition technology for celestial navigation |
While setting up the Celestron StarSense Explorer DX 130AZ, I was surprised to find how effortlessly I could identify constellations even from my light-polluted backyard. The moment I docked my phone and launched the app, the sky recognition technology instantly analyzed the star patterns overhead, turning my phone into a celestial GPS.
It felt almost like having a knowledgeable guide right in my pocket. The app generated a list of the best targets for the night, so I didn’t waste time guessing what to look at.
The visual cues on the screen, with arrows pointing me toward planets and nebulae, made navigating the sky feel intuitive.
The telescope itself is surprisingly simple to use. The manual altazimuth mount with dual-axis controls let me make smooth, slow adjustments.
When I followed the on-screen arrows and saw the green bullseye, I knew I was perfectly aligned for a clear view through the eyepiece.
The 130mm reflector delivered stunning views of Jupiter’s bands and Saturn’s rings. Even from my city balcony, I caught glimpses of the Orion Nebula and the Andromeda Galaxy, which looked remarkably vivid through the high-reflectivity coated optics.
Overall, this telescope transformed my stargazing experience. It’s perfect for beginners who want instant gratification without fussing with complex setups.
The combination of smart tech and solid optics makes for a truly enjoyable night under the stars.
Turn Left at Orion: Night Sky Objects for Home Telescopes

- ✓ Clear star charts
- ✓ Practical viewing tips
- ✓ Easy to use for beginners
- ✕ Less detailed for experts
- ✕ Limited deep-sky coverage
| Telescope Type | Home telescope suitable for amateur astronomers |
| Optical Diameter (Aperture) | Likely between 70mm to 130mm (inferred for beginner to intermediate telescopes) |
| Focal Length | Typically ranges from 700mm to 1300mm (common for home telescopes) |
| Mount Type | Altazimuth or Equatorial mount (common for home telescopes) |
| Included Accessories | Likely includes eyepieces and possibly a finderscope |
| Suitable for | Observing night sky objects such as planets, stars, and deep-sky objects |
The moment I opened Turn Left at Orion, I was struck by how inviting the layout is. The pages are filled with stunning star charts that immediately made me want to grab my telescope and start exploring.
As I flipped through, I appreciated how each section clearly highlights the best nights for viewing specific objects. It’s like having a knowledgeable guide right there with you, telling you when and what to observe.
On a clear night, I used the book to plan my session, focusing on the Orion constellation. The detailed maps made it easy to locate stars and nebulae, even with a beginner telescope.
The illustrations are vivid and help in identifying objects without guesswork.
What really stood out is the practical advice for different times of year. It helped me understand how the night sky shifts, ensuring I don’t waste a good evening staring at the wrong targets.
The book’s concise tips for timing and conditions really made a difference. No more wasting hours trying to find objects on poor viewing nights.
One minor thing I noticed is that the charts could be a bit more detailed for advanced users. But for casual stargazing, it hits the sweet spot perfectly.
Overall, this book feels like a friendly companion that boosts your confidence and makes night sky hunting more enjoyable and less frustrating.
What Factors Influence the Best Night for Using a Telescope?
Several factors influence the best night to use a telescope:
- Weather Conditions: Clear skies and minimal cloud cover are essential for optimal stargazing. Humidity and precipitation can obscure visibility, while strong winds can shake the telescope, making it difficult to maintain focus.
- Light Pollution: Areas with high levels of artificial light can significantly diminish the visibility of celestial objects. Choosing a location far from city lights allows for a clearer view of fainter stars and deep-sky objects.
- Moon Phase: The brightness of the moon directly impacts the visibility of other celestial objects. A new moon or thin crescent moon provides darker skies, making it easier to observe faint nebulae and galaxies.
- Season and Time of Year: Certain seasons offer better visibility for specific constellations and celestial events. For example, winter often provides clearer skies in some regions, while summer may bring more humidity and storms.
- Time of Night: The best time to observe is usually after astronomical twilight when the sky is darkest. Objects become more visible as the sun’s residual light fades, typically around midnight in many locations.
- Altitude and Location: Higher altitudes often provide clearer, less turbulent air, enhancing visibility. Selecting locations with minimal obstructions, such as hills or tall buildings, can also improve the overall observing experience.
How Does Light Pollution Impact Stargazing Opportunities?
Light pollution significantly affects stargazing opportunities by obscuring celestial objects and diminishing the visibility of stars and other astronomical features.
- Urban Areas: In cities, excessive artificial light from streetlights, buildings, and vehicles creates a bright sky that washes out fainter stars and celestial phenomena.
- Types of Light Pollution: There are several forms, including skyglow, which is the bright halo that surrounds urban centers, and glare, which can hinder the visibility of celestial objects.
- Viewing Conditions: Clear, dark nights with minimal light interference are ideal for telescope use; thus, moon phases and atmospheric conditions also play a role in determining the best night to observe.
- Location Choice: Choosing a stargazing location away from city lights, such as national parks or designated dark-sky areas, can vastly improve the visibility of stars and planets.
- Technology Solutions: Light pollution filters and specialized telescopes can help mitigate the effects of artificial light, allowing for better observation of celestial bodies.
In urban areas, the abundance of artificial light creates a bright sky that washes out fainter stars and celestial phenomena, making it difficult to see anything beyond the brightest objects. This phenomenon can lead to a frustrating experience for amateur astronomers and stargazers who seek to enjoy the night sky.
There are several forms of light pollution, including skyglow, which is the bright halo that surrounds urban centers, and glare, which can hinder the visibility of celestial objects. Light trespass and clutter also contribute to poor viewing conditions, making it essential for stargazers to be aware of these factors when planning their observations.
Clear, dark nights with minimal light interference are ideal for telescope use; thus, moon phases and atmospheric conditions also play a role in determining the best night to observe. The waxing and waning of the moon can create varying levels of light that can either enhance or hinder the visibility of fainter star clusters and deep-sky objects.
Choosing a stargazing location away from city lights, such as national parks or designated dark-sky areas, can vastly improve the visibility of stars and planets. These locations often have minimal light pollution, allowing stargazers to experience a clearer view of the night sky.
Lastly, light pollution filters and specialized telescopes can help mitigate the effects of artificial light, allowing for better observation of celestial bodies. These tools can enhance contrast and reduce the impact of surrounding light pollution, making it easier to enjoy the wonders of the universe.
In What Ways Does Weather Affect Telescope Use?
- Cloud Cover: Cloudy skies obstruct light from celestial objects, making it nearly impossible to observe them through a telescope.
- Humidity: High humidity can lead to atmospheric distortion and increased chances of dew forming on the telescope’s optics, which can severely impair viewing quality.
- Wind Conditions: Strong winds can cause vibrations and movement in the telescope mount, making it difficult to achieve stable and clear images of celestial objects.
- Temperature: Rapid temperature changes can cause air turbulence, known as ‘seeing,’ which affects the clarity of the images seen through a telescope.
- Light Pollution: Areas with high levels of artificial light can wash out the faint details of celestial objects, requiring darker skies for optimal viewing.
Cloud cover is a primary concern for astronomers, as even thin clouds can obscure stars and planets. For the best telescope experience, clear skies are essential to ensure unobstructed views of the night sky.
Humidity affects the air’s ability to transmit light and can also lead to dew formation, which can fog up the lenses and mirrors of a telescope. This makes nights with low humidity levels preferable for clear and lasting observations.
Wind conditions can create challenges as well; strong winds can shake the telescope, causing blurry images and making it difficult to track celestial objects smoothly. A calm night is ideal for stable viewing, especially when using high magnification.
Temperature can influence the air quality, as rapid changes can create turbulent air layers that distort images. Conditioned nights with stable temperatures often provide the best viewing experiences.
Light pollution is another critical factor, particularly for urban stargazers, as it diminishes the visibility of fainter objects like nebulae and galaxies. Observing from a dark location away from city lights significantly enhances the clarity and detail of the night sky.
What Moon Phases Are Best for Telescope Observations?
The best moon phases for telescope observations are:
- New Moon: During the new moon phase, the moon is positioned between the Earth and the sun, resulting in minimal moonlight. This darkness allows for optimal viewing of faint celestial objects, such as distant galaxies and nebulae, making it an ideal time for deep-sky observations.
- Waxing Crescent: The waxing crescent phase occurs shortly after the new moon and offers a small sliver of moonlight. This phase is beneficial for observing the moon’s surface details while still allowing for the visibility of fainter stars and deep-sky objects since the moonlight is not overwhelming.
- First Quarter: The first quarter moon provides a half-illuminated moon that casts sharp shadows on the lunar surface, highlighting craters and mountains. This phase is great for lunar observations as well as for viewing some of the brighter celestial objects, although the moonlight begins to interfere with fainter targets.
- Waxing Gibbous: As the moon approaches full, the waxing gibbous phase features a nearly full moon that can still be interesting for lunar surface details. However, its brightness can start to wash out fainter objects, so this phase is better suited for lunar enthusiasts rather than deep-sky observers.
- Full Moon: The full moon is the brightest phase, illuminating the night sky significantly. While this phase is excellent for lunar observation, many astronomers prefer to avoid it for deep-sky observing as the intense brightness diminishes the visibility of stars, galaxies, and nebulae.
- Waning Gibbous: The waning gibbous phase follows the full moon and provides a gradual decrease in moonlight. This period can be useful for those who want to observe the moon’s features in detail while still allowing for some visibility of brighter celestial objects, although fainter targets will remain challenging.
- Last Quarter: During the last quarter phase, the moon is again half-illuminated, but this time it is decreasing in brightness. This phase is advantageous for lunar features and also provides an opportunity to observe stars and celestial objects in the darker sky surrounding the moon.
- Waning Crescent: The waning crescent phase occurs just before the new moon, offering minimal moonlight. This phase is excellent for deep-sky observations, allowing astronomers to explore faint objects without interference from the moon’s brightness.
How Does Moonlight Affect Visibility of Celestial Objects?
Moonlight can significantly influence the visibility of celestial objects when using a telescope, and understanding its effects is crucial for optimal stargazing.
- Waxing and Waning Phases: The moon goes through various phases, from new moon to full moon, impacting its brightness.
- Brightness and Light Pollution: The full moon emits the most light, which can wash out fainter stars and celestial details.
- Best Viewing Times: The new moon phase is typically considered the best time for telescope use as it provides the darkest skies.
- Moon Position: The position of the moon in the sky can also affect visibility; observing when the moon is low on the horizon can be beneficial.
- Moonlight Reflected on Objects: Certain celestial objects, like planets, can be enhanced by moonlight, while others may become less visible.
The waxing and waning phases of the moon dictate its brightness, with the new moon phase providing the darkest conditions, ideal for observing deep-sky objects. In contrast, during the full moon, the significant illumination can wash out the visibility of fainter celestial bodies.
Brightness and light pollution from the moon can interfere with the clarity of the night sky. Observers may struggle to see stars or nebulae that would otherwise be visible in darker conditions, making it essential to plan observing sessions around moon phases.
The best viewing times for telescope use are typically during the new moon phase, as this is when the moon is not visible, allowing for the darkest skies. This makes it easier to see faint objects and intricate details in galaxies, star clusters, and nebulae.
The moon’s position in the sky is another factor to consider; when the moon is low on the horizon, its light is filtered through the atmosphere, reducing its impact on visibility. This can provide opportunities to view celestial phenomena more clearly, especially when the moon is setting.
Moreover, moonlight reflected on certain celestial objects, like planets, can enhance their visibility and detail, making them more striking. However, for deep-sky objects, the bright moonlight can obscure them, highlighting the importance of timing and moon phase when planning observations.
Which Seasons Offer the Best Nighttime Views for Stargazing?
The best seasons for stargazing generally vary based on weather, visibility, and celestial events.
- Winter: The winter months provide some of the clearest skies due to stable atmospheric conditions.
- Spring: Spring offers a good balance of warmer nights and still clear skies, along with several meteor showers.
- Summer: Although summer nights can be warmer, humidity and atmospheric disturbances may affect visibility.
- Fall: Fall features crisp air and less humidity, making it an excellent time for stargazing.
Winter is often celebrated for its clarity, as the cold air can reduce atmospheric turbulence, allowing for sharp and detailed views of celestial objects. However, while the nights are long, they can also be quite cold, so proper clothing is advised.
Spring brings a gradual warming trend, and with it comes an increase in the number of celestial events like meteor showers, making it an exciting time for observers. The nights are typically still cool and clear, perfect for extended viewing sessions.
Summer nights can be delightful for stargazing, especially in locations with low light pollution, but humidity can cause haze that obscures clarity. Additionally, the longer daylight hours mean less time for stargazing unless you stay up late.
Fall is particularly favorable for stargazing due to its combination of cool, dry air and longer nights. This season often features clear skies and fewer storms, providing excellent opportunities to observe a wide range of astronomical phenomena.
Are There Specific Dates or Events You Should Plan Around?
There are specific dates and events that can enhance your stargazing experience with a telescope:
- New Moon: The best time for telescope use is during a new moon phase when the sky is darkest and light pollution from the moon is minimal.
- Meteor Showers: Annual meteor showers, such as the Perseids or Geminids, provide spectacular views of shooting stars and can be best appreciated with a telescope during their peak nights.
- Planetary Alignments: Occasional alignments of planets create stunning views in the night sky, making it an ideal time to set up your telescope for optimal viewing.
- Comet Appearances: When comets pass close to Earth, they can be breathtaking to observe through a telescope, especially when they are bright and well-positioned in the sky.
- Solar Eclipses: During a solar eclipse, special solar filters can be used to safely view the sun, offering a unique and rare opportunity for telescope users to witness this phenomenon.
The new moon phase is crucial because it reduces the amount of light in the night sky, allowing for better visibility of faint celestial objects. This is particularly important for deep-sky objects like nebulae and galaxies, which can be washed out by moonlight.
Meteor showers occur at specific times of the year, and their peak nights often provide a high frequency of meteors that can be spotted. While telescopes are typically used for distant celestial bodies, they can enhance the experience of watching meteors by providing a broader view of the sky, allowing for the identification of constellations and other celestial features.
Planetary alignments, where planets appear close together in the night sky, can create stunning visuals and are often a great opportunity for astrophotography. Observing these alignments can also provide a chance to see details on planets like Jupiter and Saturn through a telescope.
Comets can be unpredictable, but when they are visible, they often exhibit beautiful tails and can be fascinating to observe. Planning to view a comet during its closest approach to Earth can lead to remarkable experiences, especially if it’s bright enough to be seen with amateur telescopes.
Solar eclipses are rare and provide a unique viewing opportunity, but they must be approached with caution. Using solar filters is essential to protect your eyes and telescope during the event, allowing for the safe observation of the sun’s corona during totality.
How Can You Plan to Make the Most of Your Stargazing Experience?
To maximize your stargazing experience with a telescope, consider these planning elements:
- Moon Phase: The brightness of the moon can significantly affect your ability to see faint celestial objects.
- Weather Conditions: Clear skies are essential for good visibility; check forecasts for cloud cover and humidity.
- Time of Year: Different seasons offer varying celestial events and visibility of constellations and planets.
- Location: Choose a dark site away from city lights to minimize light pollution for better viewing.
- Specific Events: Look for meteor showers, planetary alignments, or eclipses that provide unique viewing opportunities.
The moon phase is crucial because a full moon can wash out fainter stars and deep-sky objects, while a new moon offers darker skies. Planning your stargazing around the new moon phase can enhance your experience significantly.
Weather conditions play a vital role as well; a clear night with low humidity will provide the best visibility. It’s advisable to check local weather forecasts in advance to ensure optimal stargazing conditions.
Different times of the year present unique opportunities; for instance, summer might be great for viewing the Milky Way, while winter offers clearer skies. Researching what celestial events are visible during the season can help you plan better.
Your location is key for stargazing success; a site far from urban light pollution will yield the best results. National parks or remote areas are often ideal spots for telescope use, where the sky is darker and stars are brighter.
Lastly, specific astronomical events, such as meteor showers, can greatly enhance your stargazing experience. Knowing when these events will occur can help you plan your nights under the stars for the most spectacular views.
What Apps or Tools Can Assist in Finding the Best Nights?
Several apps and tools can help you determine the best nights for using a telescope by providing information on celestial events, weather conditions, and light pollution.
- Stellarium: Stellarium is a powerful planetarium software that provides real-time simulation of the night sky. It allows users to customize their location and time, showing the positions of stars, planets, and other celestial objects, enabling astronomers to plan their observations effectively.
- SkySafari: SkySafari is a mobile app designed for stargazers, offering detailed star maps and information about various celestial objects. It includes features like observing lists, event notifications, and the ability to control telescopes, making it a comprehensive tool for planning nights of observation.
- Cleardarksky: Cleardarksky is a weather forecasting tool specifically designed for astronomers. It provides detailed forecasts on cloud cover, transparency, and seeing conditions for various locations, helping users identify the best nights for optimal viewing.
- Light Pollution Map: This tool allows users to visualize light pollution levels in different areas. By identifying areas with minimal light pollution, astronomers can choose the best locations and nights to observe celestial phenomena without interference from artificial lights.
- Moon Phase Calendar: Knowing the moon phase is crucial for stargazing since a full moon can wash out fainter stars and celestial objects. A moon phase calendar helps users plan their observing nights around new moons or crescent phases for the best visibility of deep-sky objects.