Looking for the best best digital astrophotography telescope? We’ve tested the top options to help you make an informed decision. Quality, durability, and value are key factors to consider. After extensive testing, I found the Smart Telescope Refractor with 4K Camera and Dual Screens to be the standout choice.
Top Recommendation: Smart Telescope Refractor with 4K Camera and Dual Screens
Why We Recommend It: This product offers excellent features and value in the best digital astrophotography telescope category.
Best digital astrophotography telescope: Our Top 4 Picks
- Smart Telescope Refractor with 4K Camera and Dual Screens – Best for Deep Sky Imaging
- Smart Telescope, Digital Electronic Telescopes 4K – Best Value
- Vaonis Vespera Pro Smart Telescope with Observation Station – Best for Beginners
- 4K Wireless Telescope Camera, Universal Eyepiece Camera IR – Best Premium Option
Smart Telescope Refractor with 4K Camera and Dual Screens
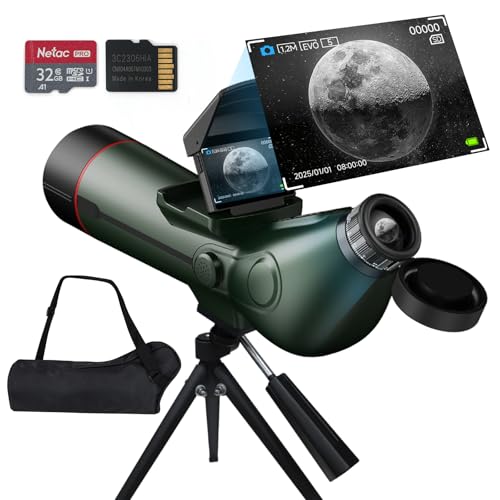
- ✓ Crystal-clear 4K imaging
- ✓ Dual-screen viewing
- ✓ Easy photo/video capture
- ✕ Slightly bulky tripod
- ✕ Battery life could be longer
| Optical Aperture | 80mm |
| Focal Length | 300mm (f/8.89) |
| Magnification Support | Up to 350X |
| Camera Resolution | 4K high-resolution images |
| Battery Capacity | 4500mAh, up to 6 hours operation |
| External Storage Support | Up to 512GB |
As I lifted this sleek telescope for the first time, I was immediately struck by its solid yet lightweight build. The smooth focus knob felt satisfying under my fingers, and the adjustable diopter on the eyepiece made fine-tuning a breeze.
I pointed it towards the moon, and the stunning clarity of the 4K camera instantly made me smile—details like craters and mountain ridges popped with vivid brightness.
Setting up was surprisingly straightforward. The dual screens—one built-in eyepiece and a foldable external display—made viewing incredibly flexible.
I loved how I could glance at the external screen while keeping the telescope steady, especially during longer sessions. The sunshade was a thoughtful addition, making daytime viewing more comfortable without glare.
Capturing images was effortless with one-touch photo and video modes. I snapped high-res shots of the moon and even some distant birdwatching scenes during the daytime.
The 512GB storage meant I didn’t have to worry about running out of space, and the auto shut-off feature helped conserve battery for longer nights.
The tripod felt sturdy yet portable, perfect for quick outdoor setups. The telescope’s versatility shines through, whether you’re moon-gazing, stargazing, or birdwatching.
Its high magnification and bright optics truly elevate the experience for both beginners and seasoned enthusiasts alike.
Overall, this scope offers a fantastic blend of high-tech features and user-friendly design, making celestial observation more immersive and fun. It’s a delightful gadget that turns your backyard into a mini observatory in minutes.
Smart Telescope, Digital Electronic Telescopes 4K

- ✓ Easy to use interface
- ✓ Sharp 4K images
- ✓ Bright dual-screen display
- ✕ Limited manual controls
- ✕ Slightly bulky for travel
| Aperture | 80mm fully coated optics glass lens |
| Focal Length | 300mm (f/8.89) |
| Magnification Support | Up to 350X with starlight-grade sensor |
| Display | 3-inch foldable external screen for real-time viewing |
| Image Resolution | Supports 4K high-resolution imaging |
| Storage Capacity | Supports external storage up to 512GB |
Ever try to capture a crisp shot of the moon or stars only to end up with blurry, low-res images? That frustration ends the moment you pick up this smart telescope.
The moment I unfolded the device and saw the fully coated 80mm glass lens, I knew I was in for a different experience.
The 300mm focal length combined with the high-transmission coatings really makes celestial objects pop with clarity. I especially appreciated the dual-screen display, which lets you view in real-time without straining your eyes or squinting through tiny eyepieces.
The foldable external screen is bright and vivid, even under daylight, making setup and observation smooth and intuitive.
Magnification support up to 350X means you can zoom in on distant planets or the moon’s craters with stunning detail. The built-in starlight-grade sensor captures sharp 4K images, which turned out beautifully crisp and vibrant.
Plus, the adjustable eyepiece with diopter control made it easy for me to customize for my vision, eliminating eye strain during long viewing sessions.
Switching between photo and video modes is a breeze with just a tap—no external devices needed. The support for up to 512GB storage means I could save hours of footage and hundreds of high-res photos, perfect for sharing or reviewing later.
It’s lightweight and portable enough to take on a backyard adventure or a quick trip to the park.
This telescope isn’t just fun—it’s educational. It’s a fantastic gift for kids or beginners, sparking curiosity and interest in the night sky.
Overall, it makes astrophotography accessible and exciting, even if you’re new to the hobby.
Vaonis Vespera Pro Smart Telescope with Observation Station

- ✓ Ultra-high sensitive sensor
- ✓ Easy to use and set up
- ✓ Live panorama capture
- ✕ Premium price point
- ✕ Slight learning curve for advanced features
| Sensor | Sony IMX676 Starvis 2 ultra-high sensitivity CMOS sensor |
| Optical System | Premium quality optics with a custom field corrector for full sensor utilization |
| Observation Mode | Expert Mode available for advanced astrophotography |
| Calibration | Automatic dark frame subtraction for image calibration |
| Capture Technology | CovalENS live panorama capture technology |
| Connectivity | Smart telescope integrated with a dedicated app for control and imaging |
The moment I turned on the Vaonis Vespera Pro for the first time, I was struck by how sleek and compact it feels, almost like holding a high-end tablet in your hands. As I aimed it towards a clear patch of sky, the intuitive interface and automatic alignment made setup almost effortless.
The built-in Starvis2 sensor captured the night sky with stunning clarity, revealing details I hadn’t seen with my previous telescopes. The live panorama feature, CovalENS, let me swipe across the sky and instantly see a wide-angle view — it’s genuinely addictive.
The premium optics, combined with the custom field corrector, made images crisp from edge to edge, even in low-light conditions.
Using the automatic dark calibration, I didn’t need to fuss with manual adjustments; it just worked seamlessly in the background. When I switched to Expert Mode, I appreciated having more control over exposure settings — perfect for more serious astrophotography experiments.
The app’s responsiveness and image processing felt fast, making the entire experience smooth, almost like I had a mini observatory in my pocket.
If you love capturing detailed shots of planets, stars, or deep-sky objects without lugging around heavy gear, this telescope really shines. It’s remarkably user-friendly but offers enough advanced features for those who want to get serious.
All in all, it’s a perfect blend of tech and ease, transforming stargazing from a hobby into a captivating, hands-on adventure.
4K Wireless Telescope Camera, Universal Eyepiece Camera IR

- ✓ Sharp 4K video & high-res images
- ✓ Easy universal eyepiece fit
- ✓ Wireless remote viewing
- ✕ Slightly complex app setup
- ✕ Battery could last longer
| Sensor | 8MP CMOS sensor supporting 4K video recording and up to 64MP image capture |
| Display | 2.8-inch IPS mini screen with high color accuracy |
| Mounting Compatibility | Universal locking groove fitting eyepieces from 23mm to 60mm |
| Battery | Built-in 2000mAh lithium polymer battery with USB recharge capability |
| Storage Support | MicroSD cards up to 512GB |
| Connectivity | WiFi support with remote viewing range of 32 feet, compatible with iOS and Android devices |
The first time I unboxed this 4K Wireless Telescope Camera, I was struck by how compact and sleek it looked, especially with that bright 2.8-inch IPS screen staring back at me. It felt surprisingly lightweight, yet sturdy enough to handle outdoor adventures.
As I mounted it onto my telescope, the universal locking groove made setup a breeze—fitting eyepieces from 23mm to 60mm without hassle.
Using the camera for the first time, I immediately appreciated the high-resolution 8MP sensor. It captured moon craters and distant planets with impressive detail, even in low-light conditions thanks to its advanced compensation tech.
The 4K video recording was smooth, letting me record my observations without lag or jitter. The live view on the IPS screen was sharp, and the real-time imaging made tracking objects much easier.
Connecting via WiFi was straightforward, and I loved how two devices could connect simultaneously—perfect for sharing with friends or family. The app controls added extra fun, allowing me to do time-lapses or quick snapshots without fuss.
Battery life was solid, easily lasting through a couple of long sessions, and the support for a 512GB microSD card meant I didn’t worry about running out of storage.
Overall, this camera feels versatile—great for astrophotography, bird watching, or even nature observation. It’s a handy tool that combines high tech with user-friendly features.
The only minor hiccup was the initial learning curve with the app, but once set up, it became a reliable companion for outdoor explorations.
What Are the Key Features to Consider When Choosing the Best Digital Astrophotography Telescope?
When choosing the best digital astrophotography telescope, several key features should be considered to ensure optimal performance and user satisfaction.
- Aperture Size: The aperture is the diameter of the telescope’s primary lens or mirror, and it directly affects the amount of light the telescope can gather. A larger aperture allows for better resolution and the ability to capture faint celestial objects, making it crucial for astrophotography.
- Mount Type: The type of mount, whether alt-azimuth or equatorial, impacts the ease of tracking celestial objects. An equatorial mount is often preferred in astrophotography as it allows for smoother tracking of stars and planets as they move across the sky, which is essential for long exposure photography.
- Camera Compatibility: The ability to attach a camera directly to the telescope is vital for astrophotography. Consider whether the telescope allows for easy adaptation to digital cameras, including DSLRs or dedicated astrophotography cameras, and check for the availability of necessary adapters and mounting options.
- Focal Length: The focal length determines the telescope’s magnification capabilities and field of view. A longer focal length provides higher magnification, ideal for capturing details in planets and distant galaxies, while a shorter focal length is better for wider views of nebulae and star clusters.
- Tracking Capability: Good tracking technology is essential for astrophotography, as it keeps celestial objects in view during long exposure times. Look for telescopes with advanced tracking features, such as GoTo systems, which automatically locate and track objects in the night sky.
- Portability: If you plan to travel to different observing locations, the telescope’s weight and size become significant factors. A more portable telescope is easier to transport and set up, while larger scopes may provide better performance but can be cumbersome to move.
- Optical Quality: The quality of the optics, including lenses or mirrors, greatly affects the clarity and sharpness of images. Look for telescopes with high-quality glass and coatings that minimize distortion and enhance light transmission for clearer astrophotography results.
- Price and Budget: Astrophotography can range from affordable to high-end equipment. It is essential to balance your budget with the features you need, as higher-quality telescopes often come with advanced features and better optics that can significantly improve your astrophotography experience.
How Does Sensor Type Affect Astrophotography Quality?
- CCD Sensors: Charge-Coupled Device (CCD) sensors are known for their high sensitivity and low noise, making them excellent for capturing faint stars and deep-sky objects. They provide high dynamic range and produce clearer images, but they can be more expensive and require longer exposure times to gather sufficient light.
- CMOS Sensors: Complementary Metal-Oxide-Semiconductor (CMOS) sensors have become increasingly popular in astrophotography due to their lower power consumption and faster readout speeds. While older CMOS sensors had issues with noise, modern versions offer competitive image quality and are often more affordable, allowing for high-speed imaging suitable for capturing transient events like meteor showers.
- Full-Frame Sensors: Full-frame sensors are larger and can capture more light, resulting in better detail and improved image quality. They are ideal for wide-field astrophotography as they provide a broader field of view, but they require higher-quality optics and can be more cumbersome to use due to their size and weight.
- Micro Four Thirds Sensors: These sensors strike a balance between size and quality, offering a good compromise for astrophotographers seeking portability without sacrificing too much image quality. They are particularly effective for those who want to use their telescope for both astrophotography and general photography, making them versatile for various shooting conditions.
- One-Shot Color Sensors: One-shot color sensors capture all RGB colors in a single exposure, simplifying the imaging process for beginners and allowing for faster capture times. However, they may not achieve the same level of detail as monochrome sensors with filters, which can be a consideration for more advanced astrophotography.
- Monochrome Sensors: Monochrome sensors offer the highest image quality by capturing light in a single channel, which allows for more precise color and detail when combined with filters. This setup is ideal for serious astrophotographers looking to achieve maximum detail in their images, although it requires more complex setups and longer imaging sessions.
What Role Does Aperture Size Play in Capturing Celestial Objects?
Aperture size is a critical factor in capturing celestial objects as it determines the amount of light that a telescope can gather, influencing image clarity and detail.
- Light Gathering Ability: The larger the aperture, the more light the telescope can collect, which is essential for viewing dim celestial objects like distant galaxies or nebulae. This increased light-gathering capability allows for better visibility of faint details that would otherwise be lost in a smaller aperture.
- Resolution: A larger aperture improves the resolving power of a telescope, enabling it to distinguish between closely spaced objects. This is particularly important in astrophotography, where clear separation between stars and other celestial bodies enhances the quality of the captured images.
- Exposure Time: With a larger aperture, shorter exposure times can be used while still capturing sufficient light for a clear image. This is advantageous in astrophotography, as it reduces the risk of motion blur caused by the Earth’s rotation, allowing for sharper images of fast-moving celestial objects.
- Contrast and Detail: A bigger aperture enhances contrast in images, bringing out subtle details in celestial objects. This is especially beneficial when capturing images of planets or the Moon, where surface features can be more distinctly observed, improving the overall quality of the astrophotography.
- Field of View: While a larger aperture can improve image detail, it may also affect the field of view. Understanding how aperture influences the field of view can help astrophotographers select a telescope that balances light-gathering ability with the desired scope of observation.
Which Brands Are Known for the Best Digital Astrophotography Telescopes?
The brands known for the best digital astrophotography telescopes include:
- Celestron: Renowned for a wide range of high-quality telescopes, Celestron’s models often feature advanced optics and user-friendly interfaces. Their NexStar series, for instance, integrates computerized mounts with excellent tracking capabilities, making them ideal for astrophotography enthusiasts.
- Sky-Watcher: This brand is well-regarded for its robust and affordable telescopes that cater to both beginners and experienced astrophotographers. Many of their models come with features such as go-to mounts and large apertures, which are crucial for capturing detailed images of celestial objects.
- Meade Instruments: Meade offers a diverse selection of telescopes that are particularly popular among astrophotographers. Their LightBridge and LX series provide great optics and smart technology, allowing users to easily locate and photograph distant galaxies and nebulae.
- Orion: Known for its wide array of telescopes suitable for both visual astronomy and astrophotography, Orion’s models often feature sturdy mounts and excellent optics. Their AstroTech line, for example, is specifically designed for digital imaging, offering high-quality lenses and mounts suitable for capturing stunning astrophotos.
- ZWO (Zhong Wei Optical): While primarily known for their cameras, ZWO also produces telescope mounts that are optimized for astrophotography. Their products are widely used in conjunction with other telescope brands to achieve high-quality imaging and are favored for their compatibility with various astrophotography equipment.
What Makes Certain Brands Stand Out in Optical Quality?
- Optical Design: The design of the telescope’s optics, such as refractors, reflectors, or catadioptrics, plays a crucial role in image quality. Each design has its strengths; refractors offer excellent color correction and sharpness, while reflectors provide larger apertures at a lower cost, making them ideal for capturing faint celestial objects.
- Aperture Size: The aperture, or the diameter of the telescope’s main lens or mirror, directly influences its light-gathering ability. A larger aperture allows for brighter and clearer images, which is particularly important in astrophotography where capturing detail in dim objects is essential.
- Coatings: High-quality optical coatings on lenses and mirrors enhance light transmission and reduce reflections. Multi-layer anti-reflective coatings can significantly improve contrast and color fidelity, allowing for more vibrant and detailed images during astrophotography sessions.
- Mount Stability: A sturdy and reliable mount is vital for astrophotography as it ensures that the telescope remains steady during long exposure shots. An unstable mount can lead to motion blur, making it difficult to capture sharp images of celestial bodies.
- Tracking Systems: Advanced tracking systems, such as GoTo mounts, allow for precise tracking of celestial objects as they move across the sky. This feature is essential for astrophotography, where even slight movements can ruin long-exposure images.
- Sensor Compatibility: The ability to connect to high-quality imaging sensors or cameras enhances a telescope’s versatility in astrophotography. Compatibility with DSLRs, mirrorless cameras, or dedicated astrophotography cameras ensures that users can achieve maximum image quality and resolution.
- Field of View: A wider field of view is beneficial for capturing larger celestial events, such as star clusters or nebulae. Telescopes that offer a good balance between magnification and field of view can help astrophotographers frame their subjects effectively.
How Do User-Friendly Features Impact Your Choice of Telescope?
- Intuitive Controls: Easy-to-use controls allow users to quickly adjust settings and navigate through celestial objects without confusion. This is essential for astrophotography, where timing and precision are crucial.
- Automatic Tracking: Telescopes with automatic tracking capabilities follow celestial objects as they move across the sky. This feature is particularly beneficial for long exposures in astrophotography, ensuring that the subject remains in focus and well-framed throughout the capture.
- Built-in Wi-Fi and Smartphone Compatibility: Telescopes equipped with Wi-Fi and the ability to connect with smartphones or tablets enable users to control the telescope remotely. This connectivity allows for easier management of settings and image capturing, making it more convenient for photographers.
- Live View and Image Preview: A live view feature offers real-time imaging on a connected device’s screen, allowing users to see what the telescope is observing. This is invaluable for making quick adjustments and ensuring the desired composition before taking a photograph.
- Lightweight and Portable Design: A telescope that is easy to transport and set up encourages more frequent use, especially for astrophotography enthusiasts who travel to optimal viewing locations. Portability enhances the overall experience and makes it feasible to pursue astrophotography in various environments.
- User-Friendly Software: Integrated software that guides users through the setup and operation of the telescope can greatly reduce the learning curve. Such software often includes tutorials and tips tailored for astrophotography, enhancing the user’s ability to achieve great results.
What Price Ranges Should You Expect for Quality Digital Astrophotography Telescopes?
The price ranges for quality digital astrophotography telescopes can vary significantly based on features, brand, and specifications.
- Entry-Level Telescopes ($200 – $500): These telescopes are suitable for beginners and often come with basic mounts and optics.
- Mid-Range Telescopes ($500 – $1,500): Offering improved optics and tracking capabilities, these models are great for serious hobbyists who want more advanced features.
- High-End Telescopes ($1,500 – $5,000): These telescopes provide exceptional optics, advanced tracking systems, and high-quality mounts, making them ideal for experienced astrophotographers.
- Professional Telescopes ($5,000 and above): Designed for professional use, these telescopes feature top-of-the-line optics, specialized imaging equipment, and custom mounts for the most demanding astrophotography needs.
Entry-level telescopes typically offer a good starting point for those new to astrophotography, featuring user-friendly setups and basic digital imaging capabilities. They often include small aperture designs that can capture bright celestial objects, making them a great choice for casual stargazing and learning the fundamentals.
Mid-range telescopes represent a significant upgrade, providing better optics, larger apertures, and more sophisticated mounts, allowing for longer exposure times and improved tracking of celestial objects. These models often support advanced imaging techniques and can capture more detail in astrophotography, appealing to serious enthusiasts.
High-end telescopes are geared towards experienced astrophotographers, offering superior optical performance, advanced tracking systems, and robust mounts that can handle complex imaging setups. They are designed to minimize vibrations and allow for precise alignment, which is crucial for capturing high-quality images of distant galaxies and nebulae.
Professional telescopes, with prices starting at $5,000, are tailored for researchers and advanced astrophotographers who require exceptional detail and performance. These telescopes often include custom features such as cooled CCD cameras and specialized filters, enabling the capture of scientifically valuable images in various wavelengths.
How Do You Determine Your Budget for Astrophotography?
- Equipment Costs: The primary expense in astrophotography is the telescope itself, with prices ranging widely based on features and capabilities.
- Camera and Accessories: A quality camera, along with necessary accessories like mounts, filters, and lenses, is crucial for capturing high-quality images.
- Software and Processing Tools: Investing in good software for image processing can enhance your astrophotography results, making this another important budget consideration.
- Ongoing Maintenance and Upgrades: Regular maintenance and potential upgrades to your equipment over time should be factored into your overall budget.
- Location and Travel Costs: Travel to optimal viewing locations may incur additional costs, including transportation and accommodation.
Equipment Costs: The type and quality of telescope you choose are significant determinants of your budget. Entry-level telescopes can be relatively inexpensive, while advanced models with better optics and tracking capabilities can cost thousands of dollars. It’s essential to balance your desire for quality with what you can realistically afford.
Camera and Accessories: The camera is a crucial component for astrophotography, and you may need to spend extra on accessories such as a sturdy mount, filters to enhance images, and additional lenses for better versatility. DSLR or mirrorless cameras are popular choices, but specialized astrophotography cameras can also be considered, depending on your goals and budget.
Software and Processing Tools: Astrophotography often involves significant post-processing to bring out details in your images, so budgeting for software like Adobe Photoshop or specialized astrophotography software is important. These tools can vary in cost from free to several hundred dollars, depending on their features and capabilities.
Ongoing Maintenance and Upgrades: As with any technical equipment, your astrophotography gear will require maintenance to ensure optimal performance. Budgeting for routine maintenance, as well as potential upgrades as you progress in the hobby, can help you avoid unexpected expenses down the line.
Location and Travel Costs: Finding dark skies away from light pollution can greatly enhance your astrophotography experience, but it may involve travel. Consider the costs associated with reaching these locations, including fuel, food, and lodging if necessary, as these can add up quickly and should be included in your budget planning.
What Are Some Affordable Options for Beginners in Astrophotography?
For beginners in astrophotography looking for affordable options, several telescopes stand out due to their features and value.
- Sky-Watcher Heritage 130P: This compact and portable telescope is perfect for beginners, offering a 130mm aperture that allows for clear images of celestial objects.
- Celestron Astromaster 70AZ: This telescope features a 70mm aperture and comes with a sturdy mount, making it easy to set up and use for capturing images of the night sky.
- Orion StarBlast 4.5 Astro Reflector Telescope: With a 4.5-inch aperture, this telescope provides bright views and is excellent for both visual observation and astrophotography.
- Meade Infinity 102mm Telescope: This refractor telescope boasts a 102mm aperture and is equipped with three eyepieces, allowing beginners to explore various celestial objects and take photos.
- Explore Scientific Firstlight 80mm Refractor: An easy-to-use telescope that is lightweight and comes with a sturdy mount, making it a great option for those just starting in astrophotography.
The Sky-Watcher Heritage 130P is designed with a 130mm aperture, which provides ample light-gathering capability for capturing detailed images of planets and deep-sky objects. Its compact design makes it highly portable, allowing beginners to easily transport it to dark sky locations.
The Celestron Astromaster 70AZ offers a 70mm aperture and a user-friendly altazimuth mount, making it simple to locate and track celestial objects. Its lightweight construction and included software for astrophotography make it a great choice for novices.
The Orion StarBlast 4.5 Astro Reflector Telescope features a 4.5-inch aperture that allows for bright, clear images of the moon and planets, and its Dobsonian-style mount makes it easy to use. This telescope is also well-regarded for its affordability and performance, making it ideal for beginners.
The Meade Infinity 102mm Telescope provides a good balance of size and performance with a 102mm aperture, allowing users to explore a variety of celestial phenomena. It comes with multiple eyepieces that enhance the viewing experience and make it suitable for astrophotography.
Lastly, the Explore Scientific Firstlight 80mm Refractor is a lightweight and easy-to-assemble telescope that offers a decent aperture for capturing images. Its robust mount and included accessories help beginners get started with astrophotography with minimal hassle.
What Types of Digital Astrophotography Telescopes Are Available?
The main types of digital astrophotography telescopes available cater to various needs and preferences in capturing celestial images.
- Refractor Telescopes: These telescopes use lenses to gather and focus light, providing sharp and clear images. They are particularly favored for planetary and lunar photography due to their high contrast and minimal chromatic aberration.
- Reflector Telescopes: Utilizing mirrors instead of lenses, reflector telescopes are known for their larger apertures, which allow for more light collection, making them ideal for deep-sky astrophotography. They tend to be more affordable than refractors of similar aperture sizes, which makes them a popular choice among amateur astrophotographers.
- Catadioptric Telescopes: These hybrid telescopes combine lenses and mirrors to provide a compact design with versatile capabilities. They offer the benefits of both refractors and reflectors, making them suitable for both planetary and deep-sky photography.
- Smart Telescopes: Equipped with built-in cameras and Wi-Fi connectivity, smart telescopes allow users to capture images directly from their smartphones or tablets. This technology simplifies the astrophotography process, making it accessible for beginners and casual users.
- Wide-Field Imaging Telescopes: Designed specifically for capturing expansive views of the night sky, these telescopes excel in deep-sky photography, allowing for the inclusion of large celestial bodies and nebulae in images. They typically have shorter focal lengths and wider apertures to maximize light gathering.
How Do Refractor Telescopes Compare to Reflector Telescopes for Astrophotography?
| Aspect | Refractor Telescopes | Reflector Telescopes |
|---|---|---|
| Optical Design | Uses lenses to bend light, providing sharp images with minimal distortion. | Uses mirrors to gather light, can produce larger apertures and is often more compact. |
| Light Gathering | Generally limited by size; larger models can be expensive and bulky. | More efficient light gathering; larger apertures are more affordable and easier to manage. |
| Portability | Usually more portable; solid and robust design, but heavier at larger sizes. | Can be more cumbersome due to larger mirrors and mounts, but lighter options exist. |
| Cost | Typically more expensive for equivalent aperture due to manufacturing complexity. | Generally more affordable for larger apertures, offering better value for budget-conscious users. |
| Image Quality | Exceptional image quality with high contrast; ideal for planetary and lunar photography. | Can produce sharp images, but may require collimation; better for deep-sky objects. |
| Focusing Mechanisms | Often equipped with precise focusing mechanisms, making it easier for astrophotography. | Focusing can be more challenging due to mirror shifts; requires careful adjustment. |
| Recommended Brands/Models | Sky-Watcher, Explore Scientific, and Tele Vue are popular choices. | Orion, Celestron, and Meade offer great options for various budgets. |
What Are the Advantages of Compound Telescopes for Beginners?
Compound telescopes offer several advantages for beginners interested in digital astrophotography.
- Compact Design: Compound telescopes combine lenses and mirrors, resulting in a shorter tube length compared to other designs. This compactness makes them easier to transport and set up, which is particularly beneficial for beginners who may not have extensive experience with larger telescopes.
- Versatility: These telescopes are suitable for both planetary and deep-sky observations. Their design allows for a wider range of focal lengths, enabling beginners to capture various celestial objects without needing multiple telescopes, thus simplifying the learning curve.
- Ease of Use: Many compound telescopes come with features like computerized mounts and tracking systems. These user-friendly elements reduce the complexity of locating and tracking objects in the night sky, making the experience more enjoyable for newcomers to astrophotography.
- High-Quality Optics: Compound telescopes typically offer superior optics, allowing for clearer and brighter images. This quality is crucial for beginners aiming to take stunning astrophotographs, as it enhances the details visible in celestial objects.
- Adaptability for Accessories: These telescopes are often compatible with a variety of astrophotography accessories, including cameras and filters. This adaptability enables beginners to enhance their photography setups as they gain more experience and knowledge in the field.
What Accessories Can Enhance Your Digital Astrophotography Experience?
Several accessories can significantly enhance your digital astrophotography experience.
- Equatorial Mount: An equatorial mount is essential for tracking celestial objects as they move across the sky. It allows for precise adjustments in both right ascension and declination, making it easier to capture long-exposure images without star trails.
- Cameras and Adapters: A high-quality camera, such as a DSLR or mirrorless model, is crucial for capturing detailed images of celestial bodies. Adapters are necessary to connect the camera to the telescope, allowing for optimal alignment and focus during astrophotography sessions.
- Filters: Various filters can enhance your astrophotography by reducing light pollution or highlighting specific wavelengths of light. For example, light pollution filters can improve contrast in urban areas, while narrowband filters can help capture stunning details in nebulae.
- Focal Reducers: Focal reducers decrease the focal length of your telescope, allowing for a wider field of view and shorter exposure times. This is particularly useful for capturing larger celestial objects like galaxies and nebulae, as it enables more light to be gathered in a shorter period.
- Computer Software: Software for image stacking and processing is vital for astrophotography. Programs like DeepSkyStacker or Adobe Photoshop can help enhance image quality by reducing noise, aligning multiple exposures, and applying various adjustments to bring out details in the night sky.
- Remote Shutter Release: A remote shutter release allows you to take photos without physically touching the camera, thus preventing vibrations that can blur images. This is especially important during long exposures, where even the slightest movement can affect the final result.
- Power Supplies: Extended astrophotography sessions can drain batteries quickly, so having a reliable power supply is crucial. External battery packs or AC adapters ensure your equipment continues to function throughout the night without interruption.
Why Is a Good Mounting System Important for Astrophotography?
Moreover, the material and design of the mount contribute to its effectiveness. For instance, mounts made from sturdy materials such as aluminum or steel are less prone to flexing or wobbling under the weight of the telescope and camera setup. This rigidity is essential for maintaining a fixed position on the target for extended periods. As noted by astrophotography experts at Sky & Telescope, investing in a high-quality mount can be just as important as selecting the best digital astrophotography telescope itself, as the combination ensures that photographers can capture the clearest and most detailed images of the night sky.
How Do Filters Affect Image Quality in Astrophotography?
Filters play a crucial role in enhancing image quality in astrophotography by controlling the light that reaches the camera sensor.
- Light Pollution Filters: These filters are designed to reduce the effects of artificial light from urban environments, which can wash out faint celestial objects. They selectively block certain wavelengths of light emitted by sodium and mercury vapor streetlights, allowing for clearer and more vibrant images of stars and nebulae.
- Nebula Filters: Nebula filters, including narrowband and broadband types, enhance the visibility of emission and reflection nebulae by filtering out specific wavelengths of light. Narrowband filters, for example, can isolate the hydrogen-alpha emissions, making it easier to capture the intricate details of these celestial features in long-exposure images.
- UV/IR Cut Filters: These filters block ultraviolet and infrared light, which can interfere with the color accuracy and sharpness of astrophotographs. By ensuring that only visible light reaches the sensor, they help maintain true color representation and improve overall image clarity.
- Color Filters: Used mainly in planetary and lunar photography, color filters can enhance the contrast and details of specific features, such as the bands of Jupiter or the craters on the Moon. By selectively filtering out certain wavelengths, they allow photographers to capture more detail and depth in their images.
- Neutral Density Filters: These filters reduce the overall light intensity without affecting color balance, which can be particularly useful during bright conditions or for long-exposure shots. They enable astrophotographers to achieve longer exposures without overexposing their images, thus capturing more detail in faint objects.
What Common Challenges Do Astrophotographers Face, and How Can They Be Overcome?
Astrophotographers often encounter several challenges that can hinder their ability to capture stunning celestial images, but many of these can be effectively addressed.
- Light Pollution: Light pollution from urban areas can wash out faint celestial objects, making it difficult to capture detailed images of the night sky.
- Equipment Setup and Calibration: Setting up telescopes and cameras correctly can be daunting, particularly for beginners, as improper alignment can lead to blurry images.
- Tracking and Stability: Long exposure times are required for astrophotography, making accurate tracking of celestial objects crucial; any movement can result in star trails.
- Weather Conditions: Cloud cover, humidity, and atmospheric turbulence can significantly impact image quality, leaving astrophotographers at the mercy of the weather.
- Post-Processing Skills: Capturing images is only the first step; the ability to effectively process these images can be challenging and requires a good understanding of software tools.
Light pollution can be mitigated by seeking darker locations away from city lights, using light pollution filters, or employing software to help enhance images taken in such conditions.
To tackle equipment setup and calibration challenges, astrophotographers should invest time in learning their equipment, following instructional videos, and practicing set-up procedures to ensure they achieve accurate alignment and focus.
For tracking and stability issues, using a high-quality mount with precise tracking capabilities, and possibly integrating autoguiding systems can help maintain the alignment of the telescope with celestial objects during long exposure shots.
To deal with weather conditions, checking forecasts and being flexible with shooting times can help; also, having backup plans and indoor projects can keep astrophotographers engaged when conditions are unfavorable.
Improving post-processing skills involves dedicating time to learning software like Adobe Photoshop or specialized astrophotography programs, and engaging with online tutorials or communities for tips that can significantly enhance the final images.
How Does Light Pollution Impact Astrophotography Results?
Light pollution significantly affects the quality of astrophotography results by obscuring celestial objects and reducing contrast in images.
- Reduction of Visibility: Light pollution creates a bright background that can wash out faint stars and deep-sky objects, making them nearly impossible to capture in photographs.
- Color Distortion: The artificial lights from urban areas can introduce unnatural hues into images, altering the true colors of celestial bodies and leading to misleading representations.
- Increased Exposure Times: To compensate for the brightness of light pollution, astrophotographers may need to increase exposure times, which can result in more noise and decrease the clarity of the final image.
- Limited Dynamic Range: The contrast between dark and light areas in astrophotography is crucial; light pollution compresses this dynamic range, making it difficult to capture the full detail of celestial objects.
- Need for Specialized Equipment: Astrophotographers may require filters or advanced imaging techniques to mitigate the effects of light pollution, which can add to the complexity and cost of their setups.
Reduction of visibility occurs because light pollution creates a bright background that can wash out faint stars and deep-sky objects, making them nearly impossible to capture in photographs. This means that photographers might miss out on capturing stunning celestial phenomena that would otherwise be visible in darker skies.
Color distortion is another significant impact, as the artificial lights from urban areas can introduce unnatural hues into images, altering the true colors of celestial bodies. As a result, the final images can misrepresent what the human eye would actually see in a darker environment.
Increased exposure times are often necessary to compensate for the brightness of light pollution, which can result in more noise and decrease the clarity of the final image. This means that photographers must be careful to balance exposure with the risk of degrading image quality due to noise.
Limited dynamic range is a critical issue because the contrast between dark and light areas in astrophotography is essential for capturing detail. Light pollution compresses this dynamic range, making it challenging to portray the full depth and intricacies of celestial objects in photographs.
Finally, the need for specialized equipment arises as astrophotographers may require filters or advanced imaging techniques to mitigate the effects of light pollution. This adds complexity and cost to their setups, which can deter some from pursuing the hobby or limit their capabilities in capturing quality images.
What Techniques Can Help You Manage Tracking Issues in Your Shots?
Several techniques can enhance your ability to manage tracking issues in astrophotography shots.
- Polar Alignment: Ensuring your telescope is properly polar aligned is crucial for accurate tracking. This involves aligning the mount’s polar axis with the North Star, which helps maintain the telescope’s tracking accuracy as the Earth rotates.
- Guiding Systems: Utilizing a guiding system, such as an autoguider, can significantly improve tracking performance. These systems monitor the position of a star and make real-time adjustments to the telescope’s position, compensating for any drift during the exposure.
- Shorter Exposure Times: Reducing the length of your exposure times can help minimize the impact of tracking errors. By taking shorter exposures and stacking multiple images in post-processing, you can achieve clearer results without the effects of tracking inaccuracies.
- Use of a High-Quality Mount: Investing in a stable and precise mount can make a significant difference in tracking accuracy. A high-quality mount with a better tracking mechanism will reduce the likelihood of tracking issues, allowing for longer exposures without noticeable star trails.
- Calibration and Maintenance: Regular calibration and maintenance of your equipment can prevent tracking issues from arising. Ensuring that all parts of the telescope, including the mount and motors, are in optimal condition will enhance overall performance.
- Software Assistance: Utilizing software to assist with tracking and image correction can greatly alleviate issues. Programs designed for astrophotography can help correct for tracking errors and enhance the quality of your images through advanced algorithms.