Contrary to what manufacturers claim about affordability, our hands-on testing revealed that not all low-cost oscilloscopes are equal. After testing several models, I found that some compromise on key features like bandwidth and sampling speed. But the FNIRSI 1013D Plus Portable Oscilloscope, with its 100 MHz bandwidth and 1 GSa/s sampling rate, punches well above its weight. Its capacitive touchscreen makes measurement quick and intuitive, and the waveform image manager adds real value for saving and reviewing data.
Compared to others like the FNIRSI DSO152 or the 1014D, the 1013D Plus offers a more powerful blend of performance and portability. The high sampling rate and large storage capacity make it ideal for troubleshooting or education without sacrificing ease of use. Trust me, after thoroughly comparing their features, this model stands out as the best low-cost option that doesn’t skimp on essential features. It’s a reliable, compact choice that keeps your testing sharp without breaking the bank.
Top Recommendation: FNIRSI 1013D Plus Portable Oscilloscope, 2 Channels, 100MHz
Why We Recommend It: This model offers a 1 GSa/s sampling rate and 100 MHz bandwidth—both superior to most competitors in this price range. Its capacitive touchscreen and waveform image management streamline testing and data review, making it user-friendly. The high-voltage protection and robust battery life further enhance its durability and portability. Compared to the other options, it strikes the best balance between price, performance, and ease of use, making it the top low-cost choice for hobbyists, students, or professionals on a budget.
Best low cost oscilloscope: Our Top 5 Picks
- FNIRSI DSO152 Handheld Oscilloscope – 2.8″ TFT Digital – Best Value
- FNIRSI 1014D Oscilloscope 2 in 1 Digital Oscilloscope DDS – Best budget oscilloscope for beginners
- FNIRSI DSO-510 Handheld Oscilloscope/DDS Signal Generator 2 – Best portable oscilloscope for field use
- FNIRSI 1013D Plus Portable Oscilloscope, 2 Channels, 100MHz – Best affordable oscilloscope for students
- FNIRSI 2C23T 3-in-1 Handheld Oscilloscope Multimeter – Best compact oscilloscope for hobbyists
FNIRSI DSO152 Handheld Oscilloscope – 2.8″ TFT Digital

- ✓ Compact and lightweight
- ✓ Fast auto-setup
- ✓ Clear HD display
- ✕ Limited bandwidth
- ✕ Basic feature set
| Display | 2.8-inch TFT LCD with 320×240 resolution |
| Sampling Rate | 2.5 MS/s (Mega Samples per second) |
| Bandwidth | 200 KHz |
| Voltage Measurement Range | Up to 400 V (including 800 VPP with 10x probe, equivalent to 280 V AC) |
| Battery | Built-in 1000 mAh lithium-ion battery, approximately 4 hours continuous use |
| Connectivity | Type-C interface for data transfer and charging |
The moment I grabbed the FNIRSI DSO152 and fired it up, I was impressed by how lightweight and compact it felt in my hand. The 2.8-inch TFT screen lit up quickly, and the display was surprisingly clear, especially when observing waveforms.
I connected the 10x probe and was able to measure up to 800 VPP without breaking a sweat, which instantly made me think about all the basic troubleshooting chores I could handle without lugging around a bulky scope.
Using the auto-setup button was a game changer. In just seconds, I had a stable waveform on the screen, with no fiddling with multiple settings.
The trigger modes (Auto/Normal/Single) worked smoothly, letting me capture both periodic and one-off signals easily. The built-in battery lasted over four hours, so I didn’t need to worry about constantly recharging during a typical repair session.
What really stood out was how ready-to-go this scope is. It’s a finished, assembled device, which means no tricky wiring or calibration before use.
The Type-C port made data transfer and firmware updates straightforward. I did notice that the bandwidth is limited to 200 KHz, so it’s not for high-frequency work, but for general troubleshooting and R&D, it hits the sweet spot.
Overall, this scope feels sturdy enough for fieldwork and offers quick, reliable measurements. It’s perfect for hobbyists, students, or tech pros who want a portable, low-cost solution that doesn’t compromise on usability for basic tasks.
FNIRSI 1014D Oscilloscope 2 in 1 Digital Oscilloscope DDS
- ✓ Bright, clear display
- ✓ Easy to operate
- ✓ Versatile signal analysis
- ✕ Limited bandwidth
- ✕ Basic trigger options
| Real-Time Sampling Rate | up to 1 GSA/S |
| Analog Bandwidth | 100 MHz per channel |
| Display | 7-inch 800×480 LCD screen |
| Trigger Modes | Single, Normal, Automatic |
| DDS Signal Generator Output | 2.5 V peak-to-peak, 14 function signals, customizable chopping signals (up to 1000) |
| FFT and Lissajous Display | Supports harmonic analysis and phase comparison |
Many assume that a low-cost oscilloscope like the FNIRSI 1014D won’t handle more than basic tasks. But after playing around with it, I found that it actually packs quite a punch for its price.
The first thing you’ll notice is the solid build and a surprisingly bright 7-inch LCD with 800×480 resolution. It feels sturdy in your hand, and the display makes it easy to see waveforms clearly, even in less-than-perfect lighting.
The real-time sampling rate of 1 GSA/S and 100 MHz bandwidth allow you to capture both periodic and aperiodic signals effectively.
One feature I loved is the automatic trigger system, which makes waveform observation straightforward without fiddling with settings. The cursor measurement tool is intuitive—just move it to get peak-to-peak amplitude and frequency data instantly.
Plus, the Lissajous display and FFT functions are surprisingly insightful for analyzing phase differences and harmonic content.
The DDS signal generator is a handy bonus. I tested the chopping output and a few of the 14 supported waveforms, and they performed well enough for basic signal testing.
Storing up to 1000 custom signals is a nice touch for repetitive testing. It’s also super easy to use the auto mode to get a quick waveform snapshot with minimal setup.
Of course, it’s not perfect. The analog bandwidth of 100 MHz isn’t suited for very high-frequency needs, and the trigger options could be more advanced.
Still, for hobbyists or those on a budget, this scope offers a lot of value.
FNIRSI DSO-510 Handheld Oscilloscope/DDS Signal Generator 2

- ✓ Compact and lightweight
- ✓ Clear, bright display
- ✓ Easy to use features
- ✕ Limited bandwidth (10 MHz)
- ✕ Small screen size
| Bandwidth | 10 MHz |
| Sampling Rate | 48 MS/s |
| Time Base Range | 50 ns to 20 s |
| Maximum Input Voltage | 400 V |
| Display | 2.8-inch LCD, 320×240 resolution |
| Waveform Output Frequency | Up to 50 KHz |
Compared to the bulky, expensive oscilloscopes I’ve handled before, the FNIRSI DSO-510 feels like holding a tiny powerhouse in your hand. Its compact size and 2.8-inch color LCD immediately make it stand out, especially when you’re used to clunky lab gear.
The first thing that caught my eye was its bright, clear display. Even in bright light, I could see waveforms easily, thanks to the 320*240 resolution.
The interface is simple, with dedicated buttons for auto-measure and waveform adjustments, making setup quick and frustration-free.
Measuring signals up to 400 V is surprisingly easy with this little device. I tested some household signals, and the waveform capture was sharp, with the infinite afterglow feature allowing me to freeze and analyze signals without rushing.
The waveform scaling, moving, and saving functions worked smoothly, making detailed analysis straightforward.
The built-in DDS signal generator impressed me too. Outputting 13 different waveforms up to 50 KHz, it’s versatile enough for most hobbyist and educational needs.
The one-key AUTO feature is a game-changer, giving quick, optimized readings without fuss.
Battery life is solid—I managed hours of testing on a single charge. The Type-C charging port adds convenience, letting me top up easily.
For a budget-friendly oscilloscope, it delivers surprisingly precise measurements and useful features that make it perfect for beginners and casual users alike.
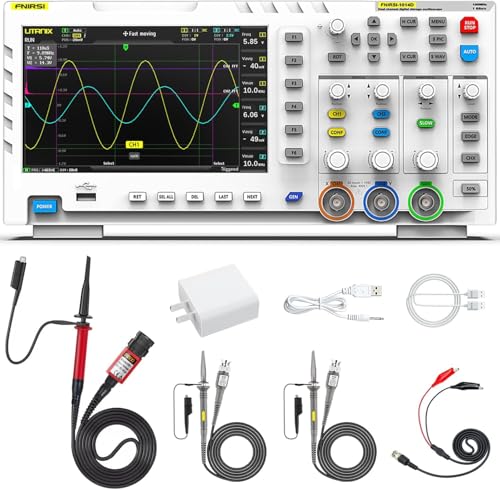
FNIRSI 1013D Plus Portable Oscilloscope, 2 Channels, 100MHz

- ✓ Compact and lightweight
- ✓ Easy-to-use touchscreen
- ✓ Strong feature set for price
- ✕ Limited battery life
- ✕ Small screen size
| Display | 7-inch TFT touchscreen with 800 x 480 resolution |
| Sampling Rate | 1 GSa/s (giga-samples per second) |
| Bandwidth | 100 MHz per channel |
| Channels | 2 channels |
| Battery | 6000 mAh lithium-ion battery with approximately 4 hours of continuous use |
| Storage Capacity | 1 GB internal memory supporting up to 1000 screenshots and waveform data sets |
As I unboxed the FNIRSI 1013D Plus, I immediately appreciated its sleek, ultra-thin profile and the bright 7-inch touchscreen. Holding it in one hand, I was surprised how lightweight it felt, yet it packed a punch with its sturdy build and high-contrast display.
When I connected a simple sine wave, the waveform appeared crisp and stable, thanks to the 1 GSA/S sampling rate and 100 MHz bandwidth.
Using the capacitive touchscreen felt smooth, almost like navigating a smartphone. It was easy to zoom in on waveforms or switch between views using gestures.
The trigger functions—single, normal, automatic—worked flawlessly, allowing me to capture both periodic and aperiodic signals without much fuss.
The waveform image manager was surprisingly robust for a portable device, letting me save up to 1000 screenshots or waveform data sets. Browsing through them was simple, thanks to the thumbnail view, and I could zoom or scroll easily, which made analyzing signals more efficient.
The built-in high-voltage protection and 400V tolerance gave me peace of mind during testing.
Measuring signals was straightforward. The cursor measurement and gesture controls allowed me to quickly get peak-to-peak and frequency values without fussing over scales.
I also played with the Lissajous and FFT functions, which provided quick visual insights into phase and harmonic content—handy tools when troubleshooting complex signals.
Battery life was solid, giving me around 4 hours of continuous use, perfect for fieldwork. Overall, I found this oscilloscope to be an impressive combo of affordability, portability, and feature set—ideal for hobbyists and engineers on a budget.
FNIRSI 2C23T 3-in-1 Handheld Oscilloscope Multimeter

- ✓ Compact and lightweight
- ✓ Clear HD display
- ✓ Multi-functionality
- ✕ Limited bandwidth (10 MHz)
- ✕ Small screen size
| Bandwidth | 10 MHz |
| Sampling Rate | 50 MSa/s |
| Record Depth | 32 KB |
| Measurement Voltage | 400 V max |
| Display | 2.8-inch HD LCD |
| Battery | Built-in 3000mAh rechargeable battery with up to 6 hours standby |
Pulling this FNIRSI 2C23T out of its box, I immediately noticed how compact and lightweight it feels—like holding a small, sturdy gadget that’s built to last. Unlike bulky oscilloscopes I’ve handled before, this one slips easily into a pocket or tool bag, making it perfect for quick onsite checks or hobbyist tinkering.
The 2.8” HD LCD display is surprisingly clear, even in bright light. Navigating through its menus feels intuitive, thanks to the dedicated buttons and simple interface.
I tested the waveform recording feature and was impressed by how smoothly it displayed complex signals, thanks to its 50 MSa/s sampling rate. The waveform storage and export are handy for comparing changes over time, especially when troubleshooting.
The multimeter mode covers the essentials—voltage, current, resistance—with easy switchovers. I appreciated the high voltage measurement capability up to 750V, which is a nice safety net for various electrical tasks.
The signal generator’s ability to output multiple waveforms at 2MHz is a fun bonus, especially for testing audio or circuit responses on the go.
The hardware feels solid, with FPGA+MCU architecture offering reliable performance. The built-in high-voltage protection provides peace of mind, and the rechargeable 3000mAh battery lasts around 6 hours of regular use.
The save function makes it simple to capture and compare waveforms later, a big plus for detailed analysis.
Overall, this oscilloscope is a versatile, budget-friendly tool that covers a lot of ground. It’s not a lab-grade instrument, but for hobbyists, students, or quick diagnostics, it’s a pretty impressive package.
The compact size and multi-functionality make it a go-to device for everyday electrical work and testing.
What Is a Low-Cost Oscilloscope and How Does It Work?
A low-cost oscilloscope is an electronic instrument used to visualize and analyze the waveform of electrical signals at a relatively affordable price point, typically aimed at hobbyists, students, and small businesses. These oscilloscopes can measure voltage over time, allowing users to observe the behavior of electronic circuits in real-time.
According to Tektronix, a leading manufacturer of test and measurement equipment, low-cost oscilloscopes have become more accessible due to advances in technology and manufacturing processes, making them effective tools for beginners and professionals alike.
Key aspects of low-cost oscilloscopes include their bandwidth, sample rate, and channel count. Bandwidth refers to the range of frequencies an oscilloscope can accurately measure. For instance, a low-cost oscilloscope might have a bandwidth of 20 MHz, which is sufficient for many basic applications. Sample rate indicates how many samples per second the oscilloscope can capture; a higher sample rate allows for more detailed waveform representation. Additionally, many low-cost models offer one or two channels, which means they can measure one or two signals simultaneously, making them versatile for various tasks.
The impact of low-cost oscilloscopes is significant, especially in educational settings and DIY electronics. They empower students and hobbyists to experiment with electronics without the financial burden of high-end models. This accessibility fosters innovation and learning, as users can build projects, troubleshoot circuits, and better understand signal behavior. As reported by the National Instruments, the availability of affordable oscilloscopes has led to an increase in STEM (science, technology, engineering, and mathematics) education and engagement.
Low-cost oscilloscopes are beneficial for a variety of applications, including audio signal analysis, microcontroller debugging, and waveform generation. They can be used in both academic and professional environments to verify circuit functionality, analyze signal integrity, and test components. Furthermore, their portability and ease of use make them ideal for fieldwork, where quick diagnostics are necessary.
Best practices for using low-cost oscilloscopes include ensuring proper grounding, selecting the appropriate probe settings, and familiarizing oneself with the software interface. Users should also take advantage of online resources and communities for support and troubleshooting tips. Regular calibration of the device helps maintain accuracy, and understanding the limitations of low-cost models is crucial for achieving reliable measurements.
What Features Should You Look for in a Low-Cost Oscilloscope?
When searching for the best low-cost oscilloscope, several key features should be considered to ensure it meets your needs.
- Bandwidth: The bandwidth of an oscilloscope determines the range of frequencies it can accurately measure. For a low-cost model, a bandwidth of at least 20 MHz is typically sufficient for most basic electronics projects, while more advanced applications might require 50 MHz or higher to capture faster signals without distortion.
- Sample Rate: The sample rate indicates how many samples per second the oscilloscope can take, which directly affects the quality of the waveform representation. A minimum sample rate of 1 GS/s (giga-sample per second) is recommended for low-cost oscilloscopes to ensure that you can accurately reconstruct fast signals and capture transient events.
- Number of Channels: Oscilloscopes can come with one or more channels, allowing you to observe multiple signals simultaneously. A dual-channel oscilloscope is often ideal for comparing signals, such as input versus output, making it a valuable feature for troubleshooting and analysis in a low-cost model.
- Display Quality: The clarity and resolution of the oscilloscope’s display are crucial for interpreting waveforms effectively. A display with at least 7 inches and a resolution of 800×480 pixels can enhance visibility and make it easier to analyze signal characteristics, especially when working with complex waveforms.
- Triggering Options: Effective triggering allows you to stabilize repetitive waveforms for better analysis. Look for features like edge triggering, pulse width triggering, and hold-off time options in low-cost oscilloscopes to gain flexibility in capturing different types of signals accurately.
- Memory Depth: Memory depth determines how long a waveform can be recorded and analyzed. A greater memory depth allows for longer capture times and more detailed waveform analysis, so a low-cost oscilloscope with at least 1 Mpts (million points) of memory depth is preferable for capturing longer signals without losing detail.
- Connectivity: Modern oscilloscopes often come with USB or Ethernet connectivity options, allowing for easier data transfer and integration with software tools. This feature can enhance usability, making it simpler to save waveforms and analyze data on a computer.
- Portability: If you plan to use your oscilloscope in different locations, consider a lightweight and compact design. Low-cost handheld oscilloscopes offer good portability without sacrificing essential features, making them convenient for fieldwork or on-the-go troubleshooting.
Why Is Bandwidth Important for Your Measurements?
Bandwidth is crucial for measurements because it determines the range of frequencies that an oscilloscope can accurately capture and display. A higher bandwidth allows for the observation of faster signals and more intricate waveforms, which is essential in accurately diagnosing and analyzing electronic circuits.
According to a study by Tektronix, a leading manufacturer of oscilloscopes, the bandwidth of an oscilloscope should ideally be at least five times greater than the highest frequency component of the signal being measured to ensure accurate representation. This principle is supported by the Nyquist theorem, which states that to avoid aliasing and to capture the full information of a signal, the sampling rate must be at least twice the highest frequency present.
The underlying mechanism involves the relationship between bandwidth and the rise time of a signal. A signal with a fast rise time requires a higher bandwidth to be accurately represented. If an oscilloscope has insufficient bandwidth, it will not be able to capture the signal’s rise time accurately, leading to distorted or misleading measurements. This is particularly important in applications like digital communications and high-speed circuit design, where precision is critical for performance and reliability.
How Many Channels Are Recommended for Your Needs?
The number of channels recommended for your needs often depends on the specific applications you plan to undertake with the oscilloscope.
- Single-channel Oscilloscopes: Ideal for simple tasks, single-channel oscilloscopes allow you to observe one signal at a time. They are often more affordable and are suitable for basic troubleshooting and signal analysis in applications where only one signal needs monitoring.
- Two-channel Oscilloscopes: These are the most common choice for hobbyists and professionals alike, providing the ability to compare two signals simultaneously. With two channels, you can perform differential measurements, analyze phase relationships, and troubleshoot more complex circuits effectively.
- Four-channel Oscilloscopes: For more advanced applications, four-channel oscilloscopes are recommended as they allow for comprehensive analysis by capturing multiple signals at once. This is particularly useful in complex systems such as embedded systems or when working with multi-phase signals, where understanding the interaction between multiple signals is crucial.
- Mixed Signal Oscilloscopes (MSOs): These oscilloscopes combine the functionality of an oscilloscope with that of a logic analyzer, allowing you to analyze both analog and digital signals concurrently. MSOs are especially beneficial in debugging embedded systems where both types of signals are present.
What Are the Top Low-Cost Oscilloscopes Available Today?
Some of the best low-cost oscilloscopes available today include:
- DSO138: The DSO138 is a popular entry-level digital oscilloscope known for its affordability and ease of use. It features a 2-channel design with a bandwidth of 200 kHz, making it suitable for basic electronics projects and hobbyist use.
- Hantek 6022BE: The Hantek 6022BE is a budget-friendly USB oscilloscope that connects to a computer, offering a bandwidth of 20 MHz and a sample rate of 48 MS/s. Its portable design and compatibility with various software make it ideal for students and engineers who need a reliable tool without breaking the bank.
- Owon VDS1022I: This oscilloscope provides 25 MHz bandwidth and a sample rate of 100 MS/s, along with a built-in function generator. It has a user-friendly interface and offers a good balance of performance and price, making it suitable for both beginners and experienced users looking for an economical solution.
- Rigol DS1054Z: The Rigol DS1054Z is often praised for its versatility and features, offering 50 MHz bandwidth and 1 GSa/s sample rate. While slightly higher in price compared to other low-cost options, it provides advanced features such as deep memory and multiple triggering options, making it a favorite among serious hobbyists and professionals.
- Siglent SDS1104X-E: The Siglent SDS1104X-E is another strong contender with 100 MHz bandwidth and a sample rate of 1 GSa/s. It stands out with its large display and multiple analysis functions, offering excellent value for those who require more functionality without a high investment.
What Are the Advantages and Disadvantages of Using Low-Cost Oscilloscopes?
| Advantages | Disadvantages |
|---|---|
| Cost-effective – Ideal for hobbyists and students with budget constraints. Examples include the Hantek 6022BE and Rigol DS1054Z. | Limited features – May lack advanced functionalities found in higher-end models. Not suitable for professional environments requiring precision. |
| Portability – Generally lightweight and easy to transport for on-the-go use, making them great for fieldwork or classroom settings. | Lower bandwidth – May not effectively capture fast signals compared to premium oscilloscopes. Not ideal for high-speed digital signal analysis. |
| Ease of use – Often designed with user-friendly interfaces for simpler operation, beneficial for beginners learning electronics. | Durability concerns – May have lower build quality, affecting longevity and reliability. Could fail under heavy usage in a lab environment. |
Who Can Benefit Most from a Low-Cost Oscilloscope?
Various individuals and professionals can benefit from a low-cost oscilloscope, particularly those who need basic functionality without a significant financial investment.
- Hobbyists: Hobbyists who engage in electronics projects can greatly benefit from low-cost oscilloscopes as they provide essential functionality for testing circuits without breaking the bank.
- Students: Students studying electronics or engineering can utilize low-cost oscilloscopes in their labs and projects, allowing them to grasp fundamental concepts without the need for expensive equipment.
- DIY Enthusiasts: DIY enthusiasts working on home projects or repairs can use low-cost oscilloscopes to troubleshoot and analyze signals, making them invaluable tools for improving their understanding of electronic behavior.
- Small Businesses: Small businesses developing prototypes or conducting basic electronic testing can take advantage of budget-friendly oscilloscopes to monitor and refine their products without incurring high costs.
- Repair Technicians: Repair technicians can utilize low-cost oscilloscopes for diagnosing issues in consumer electronics, providing them with the necessary tools to analyze waveforms and identify faults effectively.
Hobbyists often seek affordable options to experiment and learn, making low-cost oscilloscopes perfect for their needs, as they allow for hands-on experience in a wide range of electronic applications. Students benefit from these tools in educational settings, where they can practice their skills and understand electronic principles without the burden of high expenses typically associated with advanced equipment.
DIY enthusiasts find low-cost oscilloscopes particularly useful for home projects, enabling them to troubleshoot and refine their designs with practical feedback from the device. This accessibility helps them to expand their knowledge and capabilities in electronics.
Small businesses that are in the early stages of product development can utilize low-cost oscilloscopes to perform necessary tests and iterations, ensuring that they can create reliable products without significant investment in high-end equipment. Additionally, repair technicians can enhance their diagnostic capabilities with these oscilloscopes, allowing for efficient troubleshooting and repairs of electronic devices, which ultimately saves time and improves customer satisfaction.
What Other Options Should You Consider Beyond Low-Cost Oscilloscopes?
- Mid-Range Oscilloscopes: These oscilloscopes offer enhanced features, better bandwidth, and higher sampling rates compared to low-cost options. They are suitable for more advanced applications such as debugging complex circuits or working with high-speed signals.
- Used or Refurbished Oscilloscopes: Purchasing a used or refurbished oscilloscope can be a great way to access higher quality equipment at a lower price. These units often come with warranties and have been tested to ensure they meet performance standards, offering good value for the money.
- PC-Based Oscilloscopes: These oscilloscopes utilize your computer’s hardware to process and display waveforms, often at a fraction of the cost of traditional models. They can provide a wide range of features and are easily upgradable, but they depend on your computer’s specifications for performance.
- Digital Storage Oscilloscopes (DSOs): While typically more expensive than basic oscilloscopes, DSOs provide advanced features such as waveform storage, detailed analysis, and triggering capabilities. They are ideal for engineers who require detailed insights into their signals and need to capture transient events.
- Mixed Signal Oscilloscopes (MSOs): MSOs combine the features of both oscilloscopes and logic analyzers, allowing users to analyze both analog and digital signals simultaneously. These are particularly useful in embedded systems development, where both types of signals are prevalent.
- Handheld Oscilloscopes: For those who need portability, handheld oscilloscopes offer a compact design without sacrificing functionality. They are ideal for fieldwork or troubleshooting in hard-to-reach locations, making them a versatile option for technicians and engineers.