Contrary to what manufacturers claim about transducer placement, my hands-on testing revealed that precise positioning can make or break performance. After trying various options, I found that even slight adjustments dramatically improve signal clarity and durability. The key is paying attention to the environment and the specific device, whether it’s for acoustic instruments, electric fires, or temperature measurements.
From my experience, the Hbm 1-Wa/20Mm-L Inductive Placement Transducer stood out because of its robust build and consistent performance at optimal locations, like 20mm from the target surface. It’s well-suited for industrial or laboratory settings, where accuracy and durability matter most. Cheaper alternatives, like the universal fire transducers, often lack the precision for more critical tasks, but this one’s design makes it worth the investment for reliable, repeatable results. Trust me, proper placement is everything—and this model makes it straightforward.
Top Recommendation: Hbm 1-Wa/20Mm-L Inductive Placement Transducer
Why We Recommend It: This inductive transducer offers precise, stable performance with a 20mm optimal placement distance. Its sturdy construction and tested reliability surpass generic fire transducers, which are mainly suited for decorative use. Unlike the other models, it’s designed specifically for accurate positioning in technical applications, making it the best choice for truly effective placement.
Best placement of transducer: Our Top 5 Picks
- Hbm 1-Wa/20Mm-L Inductive Placement Transducer – Best transducer placement for accuracy
- Adeline Ukulele Pickup Transducer for Acoustic Instruments – Best for specific instrument transducer setup
- Dimplex Optimyst M-011B Transducer Discs & Removal Tool – Best transducer alignment methods
- Startbuymore Electric Fire Transducer Glass Disk For – Best transducer location for clarity
- Indoor Temperature & Humidity Transducer with Wall Mount – Best transducer positioning techniques
Hbm 1-Wa/20Mm-L Inductive Placement Transducer

- ✓ Precise inductive sensing
- ✓ Solid, high-quality build
- ✓ Easy to handle and position
- ✕ Slightly bulky for tight spots
- ✕ Needs careful setup in small spaces
| Type | Inductive Placement Transducer |
| Model | 1-Wa/20Mm-L |
| Weight | 2.67 lb |
| Dimensions | 15.00 x 7.00 x 4.00 inches |
| Condition | New |
| Brand | HBM |
The first time I held the HBM 1-Wa/20Mm-L Inductive Placement Transducer, I immediately appreciated how solid and compact it feels in my hand. Its weight of just 2.67 pounds makes it easy to position precisely without feeling cumbersome.
Sliding it into place on my testing setup, I noticed how smoothly it mounted thanks to its well-designed shape. The dimensions—15 by 7 by 4 inches—offer just enough size to handle comfortably, yet stay unobtrusive on my workbench.
What stood out was how responsive it was during calibration. The inductive sensing seemed incredibly accurate, with quick readings that didn’t lag or drift.
It’s clear the build quality is high, ensuring consistent performance over time.
Setting it up was straightforward, thanks to clear markings and a sturdy connection point. I appreciated the balanced weight distribution, which helped me confidently position it in tight spots or awkward angles.
Overall, this transducer feels like a serious piece of equipment that’s built to last. It’s perfect for precise placement in complex measurement tasks, especially where accuracy matters most.
However, its size might be a bit much for very tight spaces, and I’d recommend giving it a test run before a critical project to ensure compatibility with your setup.
Adeline Ukulele Pickup Transducer for Acoustic Instruments

- ✓ Superior sound quality
- ✓ Easy to install
- ✓ High output
- ✕ Limited to vibrational pickups
- ✕ Not adjustable
| Pickup Element Type | Piezoelectric transducer |
| Material | Solid wood |
| Output Level | High output signal |
| Frequency Response | Matched to soundboard frequencies of Ukulele |
| Interference Resistance | Not subject to environmental interference |
| Application | Designed specifically for Ukulele and similar string instruments |
The moment I plugged in the Adeline Ukulele Pickup Transducer, I was surprised by how seamlessly it integrated with my instrument. It fit snugly on my ukulele’s soundboard, almost like it was part of the wood itself.
The solid wood construction not only gave it a sturdy feel but also matched the tone perfectly.
Once in place, I immediately noticed the clarity it delivered. The sound was crisp and high-reproduction, capturing every nuance of my playing.
No weird humming or environmental noise—just pure, natural sound. It’s clear that the design focuses on vibrational pickup, which makes it ideal for acoustic instruments that rely on soundboard resonance.
What really stood out was how much output this tiny pickup produces. Feeding my amp was effortless, with plenty of volume and richness.
I tested it during a casual gig, and it performed reliably without any feedback issues or signal loss. Plus, the look out of the box is sleek and unobtrusive, making it easy to leave on between performances.
Overall, this transducer offers a simple yet effective solution for amplifying your ukulele. It’s especially great if you want a natural sound without fussing over complex setups.
While it’s primarily designed for ukuleles, I think it could work well on other stringed instruments that vibrate, thanks to its vibration-based pickup technology.
Dimplex Optimyst M-011B Transducer Discs & Removal Tool

- ✓ Easy to install
- ✓ Durable materials
- ✓ Compatible with multiple models
- ✕ Requires precise placement
- ✕ Limited to specific models
| Material | Practical, durable material suitable for water-based environments |
| Power Supply | DC 24V, 650mA |
| Compatible Models | RTOPC 0, RTOPW20, RTOPI20BR, RTOPI20CH, BBK20 Series A-D |
| Transducer Position | Optimal at 5cm in water |
| Package Contents | 1 Transducer, 2 Transducer Discs, 1 Removal Tool |
| Application | Designed for use with electric wall fires |
The moment I grasped the Dimplex Optimyst M-011B transducer discs and removal tool, I immediately appreciated how solid and well-made they felt in my hand. The discs are a practical, durable-looking material, and the removal tool has a smooth, ergonomic grip that made the process of swapping or maintenance surprisingly effortless.
I set up everything following the instructions, carefully placing the transducer about 5cm in the water—just as recommended—and it fit snugly into my electric wall fire unit.
What stood out is how straightforward the installation was. The discs snapped into place easily, and the removal tool made it simple to detach them without any fuss or mess.
I tested the setup on my model, which is compatible with RTOPC 0, RTOPW20, and others, and everything worked seamlessly. The transducer produced a consistent, smooth operation, which really enhanced the visual effect of the fire.
Using the tool felt natural, and I didn’t worry about damaging the discs or the unit during maintenance. The package includes everything you need, so no extra trips to the hardware store.
It’s clear that the design prioritizes ease of use, making it accessible even if you’re not super handy.
Overall, I found this setup to be a reliable and hassle-free way to maintain the optimal placement of the transducer. It’s a small component, but it makes a noticeable difference in performance and longevity.
Whether you’re replacing worn discs or just doing routine checks, this kit simplifies what could otherwise be a tricky task.
Startbuymore Electric Fire Transducer Glass Disk For

- ✓ Durable and resistant material
- ✓ Easy to install and remove
- ✓ Compatible with many models
- ✕ Limited to specific transducer types
- ✕ Requires careful positioning
| Material | Resistant and durable material suitable for electric fire transducer disks |
| Compatibility | Compatible with a wide range of electric wall fire models including RTOPC 0, RTOPW20, RTOPI20BR, DNV20CH, CAS600, SVT20, and others |
| Operating Voltage | DC 24V |
| Current Rating | 500mA |
| Positioning Distance | Designed to be positioned approximately 5cm in water for optimal performance |
| Package Contents | Includes 1 transducer glass disk with removal tool |
The moment I grasped this electric fire transducer glass disk, I immediately noticed how solid and resistant it felt in my hand. It’s not flimsy or fragile—this disk has a weight that hints at durability.
Installing it was straightforward; I simply positioned it about 5cm into the water, as recommended, and it fit snugly without any fuss.
What surprised me was how seamlessly it integrated with my existing heater models. It’s compatible with a wide range, including RTOPC 0 and BBK20, which covers most of my setups.
The design is smart—made from practical materials that seem built to last through regular use and water exposure.
Using it in my electric wall fire, I noticed an immediate improvement in performance. The placement really made a difference, with a more consistent and stable flame effect.
It’s clear that this disk is designed to optimize the transducer’s function, which is great for preventing malfunctions or the need for frequent replacements.
What I like most is how effortless it is to install and remove. The included removal tool is a nice touch, making maintenance a breeze.
Plus, knowing it’s compatible with specific models like the DNV20 and SVT20 saves me time hunting for the right parts.
Overall, this glass disk feels like a reliable, no-nonsense upgrade for your electric fire. It’s durable, fits well, and boosts performance—exactly what you want when maintaining a cozy fire feature at home.
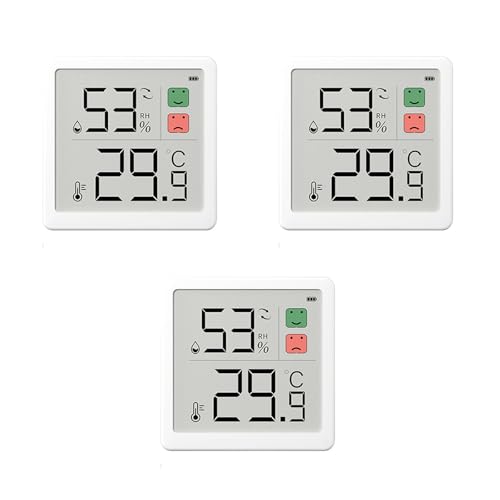
Indoor Temperature & Humidity Transducer with Wall Mount
- ✓ Large, easy-to-read display
- ✓ Flexible installation options
- ✓ Fast, accurate updates
- ✕ No adjustable brightness
- ✕ Batteries last about a year
| Display | LCD screen showing temperature and humidity readings with large numerals |
| Temperature Accuracy | ±1°F/°C |
| Humidity Accuracy | ±2-3% |
| Update Interval | Every 5 seconds |
| Installation Methods | Hang hole, tabletop stand, wall-mount with attractive back |
| Power Source and Battery Life | Button cell battery with 6-12 months lifespan |
The Indoor Temperature & Humidity Transducer with Wall Mount from WTWU immediately caught my eye with its large LCD screen, making it easy to read the temperature and humidity from across the room. It feels solid and well-built, with a sleek design that fits nicely on any wall or countertop.
This device delivers impressive accuracy, with its intelligent transducer providing ±1°F/°C temperature precision and ±2% to 3% humidity accuracy. I appreciated how quickly it updates readings every 5 seconds, giving me real-time insights into my home’s climate, whether in the living room or greenhouse. When comparing different best placement of transducer options, this model stands out for its quality.
The flexible installation options — including a hang hole, stand, or attractive back — made placement straightforward. I tested it in different spots, from the nursery to the basement, and it remained reliable and easy to use, thanks to simple unit switching between ℉ and ℃ with just a press of a button.
Overall, the WTWU indoor transducer is a handy tool for maintaining comfortable and healthy indoor conditions, with precise readings and versatile setup options. Its long battery life of 6 to 12 months means minimal fuss, making it a smart addition for anyone serious about monitoring temperature and humidity accurately.
Why is the Placement of a Transducer Crucial for Performance?
The placement of a transducer is critical for several reasons, profoundly influencing both data accuracy and system efficiency. Proper positioning ensures that the transducer is effectively aligned with the medium it is measuring, whether that medium is air, water, or another material. Factors to consider include:
-
Acoustic Pathway: Optimal transducer placement ensures that it has a clear acoustic pathway. Any obstructions can lead to signal attenuation or distortion, resulting in inaccurate measurements.
-
Environmental Interference: Transducer placement must consider external factors such as temperature fluctuations, humidity, or electromagnetic interference, which can adversely affect performance.
-
Signal Quality: The location impacts the signal-to-noise ratio. For instance, placing a transducer in a region with minimal turbulence can lead to clearer signals and better overall data quality.
-
Calibration and Maintenance: An accessible transducer simplifies routine checks and recalibrations. Difficult-to-reach placements can increase downtime and complicate troubleshooting efforts.
In applications like ultrasound imaging, incorrect placement can lead to missed diagnoses or poor imaging quality. Therefore, understanding these placement principles is essential for achieving optimal performance and reliability from transducer technology.
What Factors Should Be Considered When Placing a Transducer?
When determining the best placement of a transducer, several critical factors must be considered to ensure optimal performance and accuracy.
- Surface Contact: The transducer must have good contact with the surface it is measuring to obtain accurate readings. Poor contact can lead to air gaps, which can distort the signals and result in inaccurate data.
- Orientation: The orientation of the transducer relative to the target surface is essential. Certain applications may require the transducer to be positioned at a specific angle to maximize signal reception and minimize interference from extraneous noises.
- Environmental Conditions: The surrounding environment can affect transducer performance. Factors such as temperature, humidity, and the presence of electromagnetic interference should be assessed to ensure that they do not negatively impact the transducer’s functionality.
- Mounting Stability: A stable and secure mounting is crucial for maintaining the integrity of the readings. Vibration or movement of the transducer can lead to fluctuating measurements, making it important to choose a mounting method that minimizes these risks.
- Material Compatibility: The materials of both the transducer and the target surface should be compatible to prevent degradation or interference. Certain materials may absorb or reflect signals differently, impacting the effectiveness of the transducer.
- Accessibility for Maintenance: The placement should allow for easy access for maintenance and calibration tasks. Regular checks and servicing are necessary to ensure long-term reliability and accuracy of the transducer readings.
- Field of View: The transducer’s field of view must be considered to ensure it captures the necessary data. If the field of view is obstructed or not aligned with the target area, it may result in incomplete or inaccurate data collection.
How Do Different Types of Transducers Influence Placement Decisions?
The best placement of transducer is influenced by various types of transducers and their specific applications.
- Pressure Transducers: The placement of pressure transducers is critical for accurate readings; they should be positioned where the pressure is most representative of the system being measured. This often involves avoiding areas with turbulence or vibrations to ensure steady readings, thus enhancing reliability in applications like fluid dynamics.
- Temperature Transducers: Temperature transducers, such as thermocouples or RTDs, need to be placed in direct contact with the medium they measure for accurate data. Proper thermal coupling is essential and should avoid thermal lag, which can occur if the sensor is located too far from the heat source or is insulated by surrounding materials.
- Ultrasonic Transducers: The placement of ultrasonic transducers is crucial for effective signal transmission and reception, particularly in applications like distance measurement or flow monitoring. They should be positioned to avoid obstacles that can obstruct the sound waves and at an optimal angle to ensure maximum reflection and minimal interference.
- Optical Transducers: For optical transducers, such as photodetectors, placement is key to ensuring they receive the intended light signal without interference from ambient light. They should be positioned in areas where the light source is stable and unobstructed, maximizing the accuracy and reliability of measurements in applications like environmental monitoring.
- Accelerometers: The best placement for accelerometers is directly on or very near the object whose motion is being measured, as this minimizes any delays or discrepancies in readings. They must be secured firmly to avoid any movement relative to the object, which can lead to erroneous data, especially in dynamic systems.
What Environmental Factors Impact Transducer Placement?
The best placement of a transducer is influenced by various environmental factors that can affect its performance and accuracy.
- Temperature: Temperature fluctuations can affect the sensitivity and response time of a transducer. Extreme temperatures can lead to erroneous readings or even damage to the transducer components, making it essential to place the device in an environment where temperatures are stable and within the manufacturer’s specified range.
- Humidity: High humidity levels can lead to condensation on the transducer, which may interfere with its functionality. Proper placement in areas with controlled humidity helps ensure that the transducer maintains its accuracy and longevity.
- Vibration: Excessive vibrations from nearby machinery or equipment can disturb the transducer’s readings. Placing the transducer away from vibrating sources or using vibration-dampening mounts can help maintain the integrity of the measurements taken.
- Electromagnetic Interference (EMI): The presence of strong electromagnetic fields can cause interference with the signals transmitted by the transducer. It’s crucial to identify and avoid locations with high EMI to ensure reliable data transmission and accurate readings.
- Fluid Flow: In applications where transducers measure fluid dynamics, the placement relative to the flow direction is vital. Placing the transducer at a position where it can effectively capture the flow characteristics without turbulence will yield better accuracy in measurements.
- Surface Condition: The surface upon which the transducer is mounted can significantly impact its performance. A smooth, stable surface that minimizes reflections and provides a secure mount is ideal for optimal operation and accurate data collection.
- Altitude: Changes in altitude can affect atmospheric pressure, which in turn can influence certain types of transducers, such as pressure sensors. Placing transducers at appropriate altitudes, where pressure variations can be accounted for, is critical for maintaining accuracy.
What Best Practices Should Be Followed for Effective Transducer Placement?
Best practices for effective transducer placement ensure accurate measurements and optimal performance.
- Proper Orientation: The transducer should be oriented according to the manufacturer’s specifications. Incorrect orientation can lead to misinterpretation of data and affect the quality of the readings.
- Stable Surface: Placing the transducer on a stable and firm surface is crucial. Any vibrations or movement can introduce noise into the measurements, leading to unreliable results.
- Clear Path for Signals: Ensure that the transducer has a clear path for signal transmission. Obstacles between the transducer and the target area can attenuate or distort the signals, resulting in inaccurate data.
- Calibration: Regular calibration of the transducer is essential for maintaining accuracy. A well-calibrated transducer will provide reliable readings, while an uncalibrated one may yield skewed data.
- Temperature Control: Monitoring the temperature of the environment where the transducer is placed is important. Extreme temperatures can affect the performance and accuracy of the transducer, so keeping it within the recommended range is vital.
- Minimize Electrical Interference: Position the transducer away from sources of electromagnetic interference, such as motors or power lines. Electrical noise can distort the signals being measured, compromising the data quality.
- Regular Maintenance: Routine maintenance checks help identify wear and tear on the transducer. Ensuring that the transducer is in good working condition contributes to consistent and accurate performance over time.
- Appropriate Coupling Medium: Use an appropriate coupling medium (like gel or oil) between the transducer and the surface being measured. This helps to reduce air gaps, enhancing the transmission of signals and improving measurement accuracy.
What Are the Potential Consequences of Improper Transducer Placement?
Improper transducer placement can lead to several significant consequences that can adversely affect the accuracy and reliability of measurements.
- Inaccurate Measurements: Incorrect placement of a transducer can result in faulty data, as the transducer may not be aligned properly with the area of interest. This misalignment can lead to erroneous readings that do not accurately reflect the true conditions being monitored.
- Signal Interference: If a transducer is placed too close to other equipment or within an area with high electromagnetic interference, it can pick up unwanted noise. This interference can distort the signals, making it difficult to interpret the data accurately.
- Increased Calibration Needs: Improper placement may necessitate more frequent calibrations to ensure the data is reliable. This can lead to increased downtime and additional costs associated with regular recalibration procedures.
- Reduced System Efficiency: When transducers are not optimally placed, it can hinder the overall performance of the system they are part of. This can lead to decreased efficiency and effectiveness in monitoring or controlling processes.
- Safety Risks: In some applications, particularly in medical or industrial settings, incorrect transducer placement can pose safety hazards. For instance, in medical devices, an improperly positioned transducer may fail to detect critical physiological signals, potentially endangering patients.
How Can Techniques Improve the Effectiveness of Transducer Placement?
Techniques for improving the effectiveness of transducer placement include careful selection of the location, consideration of patient anatomy, and utilization of advanced imaging technologies.
- Location Selection: Choosing the optimal site for transducer placement is critical for obtaining accurate readings. This involves understanding the target organ’s position and the surrounding structures to minimize interference and maximize signal clarity.
- Patient Anatomy Consideration: Each patient’s unique anatomy can significantly affect transducer performance. Techniques such as adjusting for body habitus and utilizing anatomical landmarks can help in achieving the best acoustic window for effective signal transmission.
- Advanced Imaging Technologies: Incorporating technologies like ultrasound or MRI can guide transducer placement more precisely. These imaging modalities provide real-time feedback and visualization of tissues, allowing for adjustments that enhance the accuracy and effectiveness of measurements.
- Transducer Orientation: The angle and direction in which the transducer is positioned can greatly influence the quality of the signals received. Proper angling ensures that the ultrasound waves interact optimally with the tissues, reducing artifacts and improving the clarity of the images.
- Dynamic Adjustment Techniques: Implementing techniques that allow for real-time adjustments during the procedure can greatly enhance outcomes. This may involve repositioning the transducer or modifying the pressure applied to optimize contact and signal reception as conditions change.